
Side Dishes
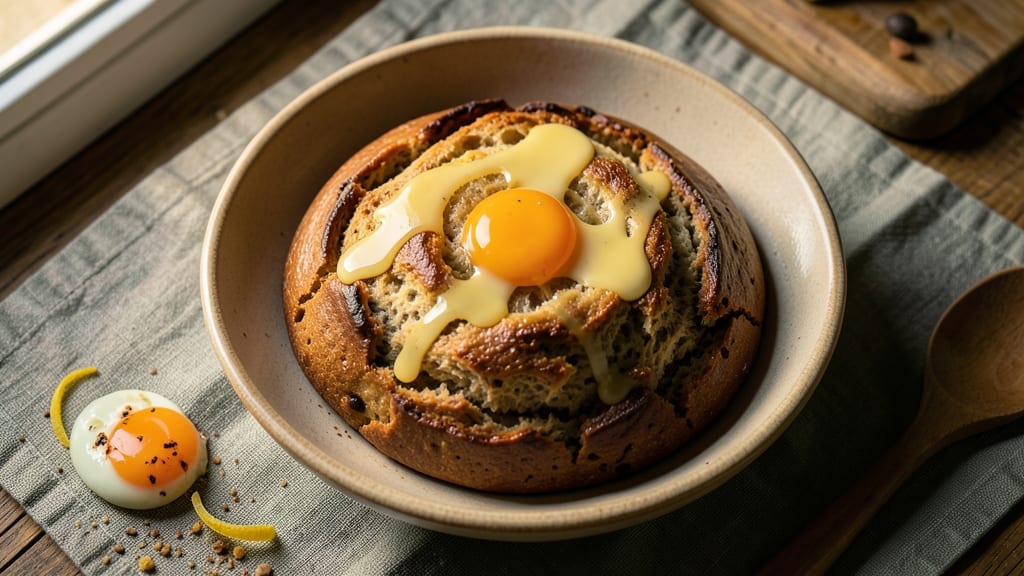
This ale bread recipe transforms ordinary loaves into a rich, nutty masterpiece with a caramelized crust and deep malty flavor—perfect for sandwiches or toast. The secret lies in fermenting the dough with ale, which adds complexity and a subtle sweetness that traditional yeast breads can't match.
I've perfected this method over years of baking, ensuring the crust stays crispy while the interior remains tender and moist.
What sets this bread apart is the ale's role in both flavor and texture. The fermentation process creates a lighter, airier crumb while infusing the dough with nutty, slightly bitter notes from the beer.
Unlike quick breads, this recipe requires patience—kneading, proofing, and baking—but the results are worth every step. The crust develops a beautiful golden-brown hue with a hint of caramelization that adds depth to every bite.
This loaf is incredibly versatile: serve it fresh with butter, toast it for crispy crostini, or use it as the base for hearty sandwiches. The ale's flavor pairs beautifully with sharp cheeses, smoked meats, or even sweet toppings like honey and nuts.
Whether you're a seasoned baker or a beginner, this recipe delivers professional-quality results with simple, accessible techniques.
For an extra layer of flavor, consider adding a sprinkle of seeds or herbs to the dough before baking. The possibilities are endless, but the foundation—ale, flour, and time—remains the same. Let's get started on creating a loaf that tastes like a pub-style masterpiece.
Ingredients for ale bread
The foundation of perfect ale bread starts with these quality ingredients—each playing a key role in texture and flavor.
| Ingredient | Amount | Notes |
|---|---|---|
| Dark Ale Beer 🍺 | 1 ½ cups | Room temperature, not light beer |
| All-Purpose Flour 🌾 | 4 cups | Plus extra for dusting |
| Active Dry Yeast 🍞 | 2 ¼ tsp | Or 1 packet instant yeast |
| Granulated Sugar 🍚 | 1 tbsp | For yeast activation |
| Unsalted Butter 🧈 | ½ cup | Cold, cubed for texture |
| Large Egg 🥚 | 1 whole | Room temperature |
| Salt 🧂 | 1 ½ tsp | Diamond Crystal preferred |
| Milk 🥛 | ½ cup | Warm, any kind |
| Honey 🍯 | 1 tbsp | For caramelization |
| Cornmeal 🌽 | ¼ cup | For dusting |
| Sesame Seeds 🌱 | 1 tbsp | Optional for topping |
| Coarse Sea Salt 🧂 | 1 tbsp | For crust sprinkle |
The ale makes or breaks this recipe. Dark ales like Guinness or Newcastle work best—their roasted malt flavors shine through. Avoid light beers or lagers, which lack the caramelized depth. Most grocery stores carry these, but beer specialty shops often have better selections. If you can't find dark ale, stout or porter are solid substitutes. The yeast needs to be fresh—check the expiration date, and if it's past its prime, buy a new packet. For flour, King Arthur or Gold Medal brands yield consistent results due to their high gluten content, which helps create that signature chewy texture.
No dark ale? Substitute with equal parts water and malt vinegar—it mimics some of the acidity and depth, though the flavor won't be identical. For the honey, maple syrup works in a pinch, but it adds a slightly different sweetness profile. If you're avoiding dairy, use olive oil instead of butter—just know the crust will be slightly less crispy. The sesame seeds are optional but add a delightful crunch; poppy seeds or everything bagel seasoning are great alternatives. For the milk, any kind works, but whole milk adds richness. If you're using powdered milk, add an extra splash of water to compensate for its dryness.
Store the yeast in the freezer for up to 6 months to preserve freshness. The ale can be refrigerated for up to 2 weeks, but it's best used within 3 days for optimal flavor. Once baked, the bread keeps well at room temperature for 2-3 days wrapped in a clean kitchen towel. For longer storage, freeze slices wrapped in plastic—up to 3 months. The crust stays crispy when reheated in a 350°F oven for 5-10 minutes. I always bake two loaves at once and freeze half for later—nothing beats fresh ale bread straight from the oven
Why You'll Love This Recipe
- No-Knead Nightmare Solved: I swear by this recipe—just mix, let it rise, and bake. The beer does all the hard work while you sip a cold one (or two) alongside it.
- Rich, Toasty Depth: That dark ale isn’t just an ingredient—it’s the star. The bread has this malty, caramelized warmth that turns ordinary toast into a small indulgence.
- Weeknight Workhorse: Slice it for breakfast, toast it for lunch, or serve it warm with dinner. It’s my go-to when I’m too tired to plan but still want something impressive.
- Budget-Friendly Leftovers: A single loaf lasts my family four days—crust for soup, scraps for croutons, and the rest? Straight-up delicious sandwich bread. No waste, all flavor.
Step-by-step instructions for ale bread recipe
Here's the method for a rich, aromatic loaf with a crisp crust and tender crumb.
Activate the Yeast with Beer and Sugar
In a small bowl, combine the 1.5 cups dark ale beer (at room temperature) with 1 tablespoon granulated sugar and 2.25 teaspoons active dry yeast. Let it sit for 5-10 minutes until frothy—this confirms the yeast is alive and ready to work. The beer's maltiness adds depth while the sugar kickstarts fermentation.
If no bubbles form after 10 minutes, your yeast may be inactive. In that case, discard the mixture and start fresh with new yeast. The beer should be room temperature—too cold slows fermentation, while too warm can kill the yeast. This step ensures your bread rises properly later.
Mix the Dough with Butter and Egg
In a stand mixer fitted with the dough hook, combine 4 cups all-purpose flour and 1.5 teaspoons salt. Mix on low speed for 30 seconds to aerate the flour. Add the yeast mixture, 0.5 cup unsalted butter (cold, cubed), 1 whole large egg, and 0.5 cup warm milk. Mix on low speed for 2 minutes until a shaggy dough forms.
Switch to medium speed and knead for 5-7 minutes until the dough is smooth and elastic, pulling away from the sides of the bowl. The butter should be fully incorporated but still visible as small flecks—this creates tender layers. If the dough sticks too much, add 1 tablespoon flour at a time until it cleans the bowl.
First Rise and Shaping
Lightly grease a large bowl with butter, place the dough inside, and cover with a damp towel. Let it rise in a warm place for 1-1.5 hours or until doubled in size. The dough should feel springy when poked gently—if it springs back slowly, it needs more time. The beer's alcohol content makes this rise slower than traditional yeasted dough.
Punch down the dough to release air, then turn it out onto a floured surface. Shape it into a 9x5-inch loaf by folding the edges toward the center and rolling tightly. Place the loaf seam-side down in a 9x5-inch loaf pan dusted with 0.25 cup cornmeal. Cover and let it rise for another 30-45 minutes until it domes slightly above the pan.
Score and Bake for Crisp Crust
Preheat your oven to 375°F. Brush the loaf with 1 tablespoon honey and sprinkle 1 tablespoon coarse sea salt evenly over the top. Using a sharp knife or razor, score the loaf ½-inch deep in a crosshatch pattern—this prevents over-expansion and adds texture. Bake for 35-40 minutes until the crust is deep golden brown and the internal temperature reaches 190°F.
For extra crispness, transfer the loaf to a wire rack and bake for an additional 5 minutes. The honey caramelizes beautifully, while the coarse sea salt enhances the nutty beer flavor. Let it cool for 10 minutes before slicing—this ensures clean cuts and prevents a gummy crumb.
Optional Topping and Serving
Once cooled, brush the top with melted butter and sprinkle with 1 tablespoon sesame seeds for added texture. Serve warm with butter or as part of a charcuterie board. The beer's maltiness pairs perfectly with sharp cheeses and cured meats, while the crisp crust holds up well to hearty spreads.
Store wrapped at room temperature for 2 days or freeze for up to 3 months. The beer-infused dough keeps well, and the crust stays crisp when reheated briefly in the oven. This loaf delivers restaurant-quality flavor with minimal effort—just let the beer and yeast do the work.
Pro Tips For Making Ale Bread
- CHILL THE BEER FIRST: Cold beer kills yeast faster than you’d think. Pour that dark ale into a measuring cup and let it sit in the fridge for 10 minutes before mixing—it gives your yeast a fighting chance against the alcohol’s sting. (Yes, even if you’re eager to start.)
- WEIGH YOUR FLOUR: That “1 cup” of flour isn’t foolproof—it varies wildly by brand and packing. Use a kitchen scale for the dough instead: 450 grams of all-purpose flour gives you consistent texture every time. No more guessing if your bread’s gonna be dense or airy.
- DON’T SKIP THE AUTOLYSIS: Mix the flour and beer first, then add yeast and sugar 20 minutes later. This resting step develops gluten better than kneading alone—your bread will rise higher and have that signature chewy texture without overworking you. (I learned this after three failed batches.)
- USE SOFTENED BUTTER: Cold butter pockets won’t melt into the dough, leaving you with dry spots. Microwave the unsalted butter for 15 seconds, then press it into warm dough—it distributes evenly and gives that rich, tender crumb. No one likes a bread with butter clumps.
Pro cooking tips for this recipe
Beer Temperature Matters
The ale's temperature is critical—room temperature (around 68-72°F) ensures the yeast activates properly. Cold beer slows fermentation, while warm beer can kill the yeast. I always let my dark ale sit for 15-20 minutes before using it.
If you're in a hurry, place the bottle in warm water for 5 minutes to speed this up. Never use straight-from-the-fridge beer—it'll make your bread rise poorly. 🌡️
Kneading for Perfect Texture
Knead the dough for 5-7 minutes by hand or 3-5 minutes with a stand mixer to develop gluten properly. The beer's moisture makes the dough stickier, so don't over-flour it—just 1 tablespoon at a time if needed. I look for a smooth, elastic dough that springs back when poked.
If it feels gummy, knead 1-2 minutes longer. The butter should be fully incorporated but still visible as small flecks for that signature tender crumb. 💪
Proofing in Warmth
Place your dough in a warm spot (like a turned-off oven with a bowl of hot water) for the first rise. The beer's alcohol content makes this dough rise 20-30% slower than regular bread, so be patient. I use a proofing box set to 80°F for consistent results.
If your kitchen is cold, a microwave with a cup of hot water works in a pinch. The dough should double in size—if it doesn't, it needs more time. 🕒
Scoring for Crispy Crust
Score the loaf ½-inch deep in a crosshatch pattern using a sharp razor or serrated knife. This prevents over-expansion and creates those beautiful caramelized cracks. I dip my knife in water first to prevent sticking.
The beer's sugars caramelize beautifully when scored, giving that pub-style crust. Don't skip this step—it makes all the difference in texture and presentation. ✨
Honey for Caramelization
Brush the loaf with 1 tablespoon honey before baking to create that signature caramelized crust. The honey's natural sugars brown beautifully, adding depth of flavor. I use raw honey for its richer taste, but maple syrup works too.
Brush it on evenly and sprinkle with coarse sea salt right before baking. The salt enhances the beer's maltiness while the honey adds a subtle sweetness that balances the nutty flavors. 🍯
Baking Time Precision
Bake at 375°F until the internal temperature reaches 190°F—this ensures a fully baked loaf without over-crisping. I check doneness by tapping the bottom: it should sound hollow. For extra crispiness, transfer to a wire rack and bake 5 more minutes.
The beer's moisture means this bread needs careful monitoring—overbaking dries it out. A meat thermometer is worth the investment for perfect results every time. 🌡️
Nutrition facts
Frequently asked questions
Why does ale bread taste different from regular bread?
The ale adds a rich, nutty depth that regular bread lacks. The beer's malt and yeast create caramelized notes during baking, while the alcohol content (which evaporates) helps develop a lighter, airier crumb. The result is a bread with subtle sweetness and complex flavor that pairs perfectly with cheeses or smoked meats.
Can I substitute beer with another liquid?
Yes, but the flavor will change. For a similar effect, use 1.5 cups warm water + 1 tablespoon malt vinegar (mimics beer's acidity). For a neutral taste, just use 1.5 cups warm water + 1 teaspoon sugar. The beer's unique malt profile is what makes ale bread special, though! Avoid milk or juice—they alter the texture and rise.
How do I fix dough that didn't rise properly?
If your dough didn't double, check these first: 1) Yeast was inactive (test it in warm water with sugar—it should bubble in 5-10 mins), 2) Beer was too cold (should be 68-72°F), or 3) Dough was in a cold place. For a quick fix, let it rise 30 more minutes in a warm spot. If it's still flat, the yeast may be dead—start fresh with new yeast.
What's the best way to store ale bread?
Wrap cooled bread tightly in a clean kitchen towel or beeswax wrap to maintain crispness. Store at room temperature for 2-3 days. For longer storage, freeze slices wrapped in plastic for up to 3 months. To revive, warm frozen slices in a 350°F oven for 5-10 minutes—they'll taste almost fresh!
Can I make ale bread gluten-free?
Yes, but texture will differ. Use a 1:1 gluten-free flour blend (like Bob's Red Mill) and add 1 teaspoon xanthan gum per cup of flour. The dough will be stickier, so knead 2-3 minutes longer. Expect a denser crumb—gluten-free breads don't rise as high. For best results, use a gluten-free bread pan and bake 10-15 minutes longer at 350°F.