
Side Dishes
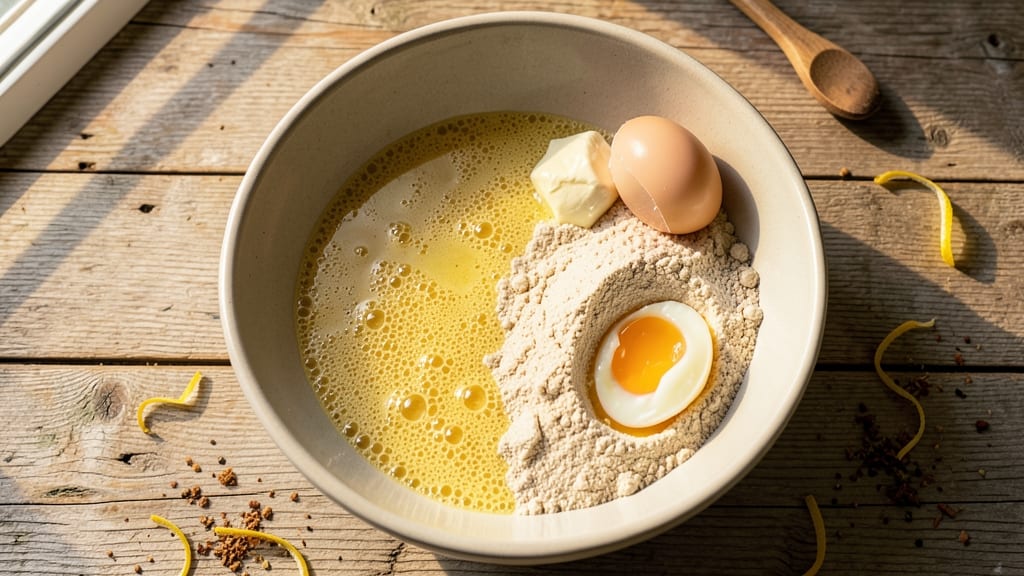
This all-purpose bread dough recipe delivers the perfect foundation for sandwiches, pizza crusts, and dinner rolls—foolproof and adaptable for any baking project. The secret lies in balancing hydration and gluten development to create dough that rises evenly and bakes up with a golden, crispy crust and tender interior.
I’ve refined this recipe over years of testing, ensuring it works whether you’re shaping loaves, rolling out pizza, or crafting garlic bread.
The process is straightforward but requires patience: mixing warm ingredients for optimal gluten formation, kneading until smooth, and proofing at the right temperature for that airy texture. No special equipment is needed—just a mixing bowl, your hands, and a little time.
The dough’s versatility means you can transform it into anything from classic sandwich bread to crispy garlic knots, all with the same reliable rise.
What sets this recipe apart is its consistent results—no more dense loaves or flat pizza crusts. The dough stays fresh for up to 3 days in the fridge or can be frozen for later use, making it ideal for meal prep.
Whether you’re a beginner or a seasoned baker, this dough will become your go-to for homemade bread that tastes better than anything store-bought.
Ready to bake? The instructions break down each step—from mixing to shaping—with tips to troubleshoot common issues like overproofing or uneven baking. For extra flavor, try adding herbs, cheese, or garlic to the dough before shaping. Let’s get started on your first batch!
Ingredients for all purpose bread dough
Nine simple ingredients transform into the perfect dough for sandwiches, pizza, and rolls.
| Ingredient | Amount | Notes |
|---|---|---|
| All-Purpose Flour 🌾 | 5 cups | Plus 1 tbsp for dusting |
| Active Dry Yeast 🍞 | 2 ¼ tsp | Or 1 packet (7g) |
| Granulated Sugar 🍚 | 1 tbsp | Feeds the yeast |
| Warm Water 💧 | 1 ¼ cups | 105-110°F (40-43°C) |
| Unsalted Butter 🧈 | ¼ cup | Softened, full-fat preferred |
| Large Egg 🥚 | 1 whole | Room temperature |
| Kosher Salt 🧂 | 1 ½ tsp | Diamond Crystal preferred |
| Olive Oil 🫒 | 1 tbsp | For dough handling |
| Cornmeal 🌽 | ½ cup | For dusting surface |
The flour is the backbone—King Arthur or Gold Medal are my go-tos for consistent rise. Yeast can be tricky: if it's older than 4 months, test it first by dissolving in warm water with sugar—should foam in 5-10 minutes. Butter matters here—full-fat gives better flavor and texture. I always use Land O'Lakes unsalted from the dairy section, not the baking aisle. The water needs to be warm but not hot—105-110°F is ideal. Too hot kills the yeast, too cold slows it down. For the egg, room temperature helps it blend smoothly—just pop it out 15 minutes before mixing.
No yeast? Instant yeast works 1:1. Short on butter? Olive oil at half the amount keeps it tender. The salt can be omitted if you're sensitive to sodium, but Diamond Crystal measures differently than Morton—use 1 tsp if you've got the latter. Cornmeal is optional but helps with sticking. For extra flavor, add 1 tsp garlic powder or 1 tbsp dried herbs to the dough before shaping. The olive oil is worth the extra tablespoon—it makes the dough silky and prevents cracking. And if you're making pizza, add 1 tsp Italian seasoning to the dough for authentic flavor.
Freshly mixed dough keeps 3 days in the fridge wrapped tightly in plastic. For longer storage, shape into a ball, freeze for 1 hour, then wrap in foil and freeze for up to 3 months. Thaw overnight in the fridge before using. I always make a double batch—one for baking, one to freeze. The frozen dough thaws beautifully and bakes just like fresh. For best results, let dough rest at room temp for 1 hour after mixing before shaping—this relaxes the gluten and makes it easier to handle.
Why You'll Love This Recipe
- Five-Ingredient Magic: I swear by this combo—flour, yeast, sugar, water, and butter. That’s it. No fussing with specialty flours or obscure leaveners; just pantry staples that transform into something golden and pillowy with minimal elbow grease.
- Butter’s Secret Boost: Here’s what sold me—the cold butter cubes melt into the dough just enough to keep every bite tender but still crisp at the edges. (Yes, even on a Tuesday night.)
- Shape It Any Way: Need dinner rolls? Garlic knots? A loaf for sandwiches? This dough handles it all—no special techniques required. I’ve even stuffed it with cheese and herbs when I’m feeling fancy.
- Dough Stash Savior: Between us, I always make extra. It keeps in the fridge for days, freezes like a dream, and turns into toast, croutons, or even fried dough when I’m craving something different. Zero waste, all flavor.
Step-by-step instructions for all-purpose bread dough
This flexible dough works for sandwiches, pizza, or dinner rolls—let's make it together.
Activate the Yeast with Warm Water and Sugar
In a small bowl, combine the 1.25 cups warm water (between 105-110°F) with 1 tbsp granulated sugar and 2.25 tsp active dry yeast. Let it sit for 5-10 minutes until frothy—this confirms the yeast is alive and ready to work. If it doesn't bubble, your yeast might be dead, and you'll need to start over.
I like to test the water temperature by placing my finger in it—it should feel warm but not hot. Too hot water kills yeast, while too cold water slows activation. The sugar feeds the yeast, helping it multiply and create that perfect rise later.
Mix the Wet Ingredients
In a large mixing bowl, combine the 0.25 cup softened unsalted butter, 1 whole large egg, and 1 tbsp olive oil. Use a wooden spoon or your hands to mix until the butter is fully incorporated and the mixture looks creamy. This step ensures even distribution of fat, which keeps the finished bread tender.
Add the yeast mixture from Step 1 to the wet ingredients and stir gently. Then sprinkle in 1.5 tsp kosher salt and 5 cups all-purpose flour, mixing just until combined. The dough will be shaggy at this point—don't worry, it will come together in the next step. I find using my hands for this part gives me better control than a mixer.
Knead the Dough Until Smooth and Elastic
Turn the dough onto a lightly floured surface and knead for 8-10 minutes by hand, or use a stand mixer with a dough hook attachment for 5-6 minutes on medium speed. You'll know it's ready when the dough is smooth, elastic, and springs back slowly when poked.
During kneading, add 1 tbsp extra flour if the dough feels too sticky. The goal is to develop gluten, which gives bread its structure. I like to do this on a clean kitchen counter—it's easier to clean up than a floury work surface. If the dough tears, just pinch it back together and keep going.
Let the Dough Rise Until Doubled in Size
Lightly grease a large bowl with olive oil, place the dough inside, and cover it with a damp kitchen towel or plastic wrap. Let it rise in a warm place (like near a turned-off oven with the light on) for 1-2 hours, or until it has doubled in size. The dough should look puffy and feel spongy when pressed gently.
I usually check it after an hour—if it hasn't doubled yet, give it more time. The warm environment helps the yeast work faster, but don't rush it. Overproofing can make your bread dense. Once it's ready, punch down the dough to release any air bubbles before shaping it for your recipe.
Shape and Second Rise Before Baking
Divide the dough into your desired portions (like 4 equal pieces for rolls or a single large piece for pizza). Shape each piece according to your recipe, then place them on a floured surface or baking sheet. Cover loosely with a towel and let them rise again for 30-60 minutes until puffy.
For best results, preheat your oven to 375°F while the dough does its final rise. This second rise gives the bread its airy texture. If you're making sandwich rolls, I like to brush them with a little melted butter after baking for extra flavor. The dough is now ready to be baked into whatever delicious creation you have in mind!
Pro Tips For Making All Purpose Bread Dough
- MEASURE WATER BY TEMPERATURE: I learned this the hard way—yeast dies if the water’s too hot or too cold. Fill a measuring cup with water, microwave it for 30 seconds, then check: it should feel like a warm bath (105–110°F). If it’s steaming, wait 2 minutes; if it’s tepid, warm it another 10 seconds. No guesswork.
- KNEAD UNTIL IT SPRINGS BACK: Stop when the dough bounces like a ball dropped from your waist—not your fingertips. Over-kneading makes bread dense; under-kneading leaves it gummy. Wet your finger, poke the dough, and if it snaps back slowly, it’s ready. (Yes, even if your arms are tired.)
- SALT THE DOUGH FIRST: Toss the salt into the flour before mixing—it dissolves better and distributes evenly. I used to add it later and ended up with pockets of bland dough. Trust me, your bread will taste more balanced if the salt’s already married to the flour.
- LET THE BUTTER SOFTEN, DON’T MELT IT: Cut the cold butter into small cubes and mix it in at the end of kneading—it should look like pea-sized shards, not a greasy mess. If it melts, your bread will be heavy. Keep a bowl of ice water nearby to chill your hands if needed; this isn’t the time for warm fingers.
Storing and reheating this dish
Refrigerator Storage
After shaping your dough, store it in an airtight container or tightly wrapped in plastic wrap in the fridge for up to 3 days. The cold slows yeast activity, preserving freshness without overproofing.
I like using glass containers with snap-on lids—they keep dough moist and prevent freezer burn better than plastic bags. For best results, let the dough sit at room temperature for 30 minutes before shaping if you're using refrigerated dough. 💫
Freezer Prep
For long-term storage, shape your dough into balls or loaves, then freeze for 1 hour before wrapping tightly in plastic wrap and foil. This prevents freezer burn and makes thawing easier. Label bags with the date—frozen dough stays fresh for 3 months.
To use, thaw overnight in the fridge or bake straight from frozen at 375°F for 10-15 minutes longer than usual. My go-to is freezing dough for garlic bread or pizza crusts—they thaw perfectly for weekend baking. ❄️
Thawing Techniques
Never microwave frozen dough—it kills the yeast and makes bread dense. Instead, transfer dough to the fridge 12 hours before baking to thaw slowly. For quicker use, place the wrapped dough in a bowl of warm water (like a proofing bath) for 30-45 minutes until pliable.
This method works great for dinner rolls or baguettes. Always let dough rest 20 minutes after thawing before shaping to relax the gluten. 🔥
Reviving Stale Dough
If your dough feels dry or cracked after refrigeration, don’t toss it! Sprinkle 1 tsp warm water and ½ tsp olive oil over the surface, then knead gently for 2 minutes to redistribute moisture. For extra flavor, add 1 tsp melted butter or 1 tsp honey while kneading.
This trick works wonders for dough that’s been stored 2-3 days—it’s like giving it a second chance! I’ve revived dough this way for cheesy garlic bread with great results. ✨
Baking from Cold
For a shortcut, bake frozen dough directly from the freezer—just add 10-15 minutes to your recipe’s bake time. Preheat your oven to 375°F and bake as usual, covering loosely with foil if the crust browns too quickly. This is my weeknight hack for pizza crusts or homemade rolls.
Just avoid this method for sandwich bread—it won’t rise properly. Always check internal temperature with a thermometer (190-200°F for rolls, 210°F for loaves). 🌡️
Reheating Baked Goods
To revive stale bread, wrap slices in aluminum foil and warm in a 350°F oven for 5-8 minutes. For rolls or pizza crusts, brush with melted butter and reheat at 375°F for 3-5 minutes until golden.
I also love using a cast-iron skillet on the stovetop—just heat it over medium heat and warm bread for 1-2 minutes per side until crispy. Avoid the microwave—it makes bread gummy. 💡
Nutrition facts
Frequently asked questions
Can I make this dough without a stand mixer?
This dough works perfectly by hand. Knead for 8-10 minutes on a lightly floured surface until smooth and elastic. Use the "windowpane test"—stretch a small piece of dough thin enough to see light through it. The gluten development is what gives bread its structure, so don't skip this step.
Why did my dough collapse after baking?
Collapsed bread usually means overproofing or weak gluten. Check if your dough doubled in size during proofing—if it rose too much, it may have overproofed. Also, ensure you kneaded long enough to develop proper gluten. For next time, try reducing proofing time by 15-20 minutes or kneading 2 extra minutes by hand.
Can I add cheese or herbs to this dough?
Yes! For garlic bread, mix in 2 tbsp minced garlic and ¼ cup grated Parmesan during the final kneading. For herb bread, add 1 tbsp dried rosemary or thyme. Just remember: extra ingredients can make the dough stickier, so you may need 1-2 tbsp more flour during kneading. Distribute evenly for consistent flavor.
How do I know when the dough is fully proofed?
Gently press two fingers into the dough—if it springs back slowly (not immediately) and leaves a slight indent, it's ready. For visual confirmation, the dough should have doubled in size. A warm spot (like near a turned-off oven light) speeds up proofing, but don't rush it—overproofed dough won't bounce back at all.
Can I use whole wheat flour in this recipe?
You can substitute up to 25% whole wheat flour (about 1.25 cups) for a nuttier flavor, but expect a denser texture. Whole wheat absorbs more moisture, so you may need 1 tbsp extra water. For best results, use King Arthur whole wheat flour—it bakes up lighter than store brands. Avoid exceeding 25% or the dough may become too sticky to handle.