
Side Dishes
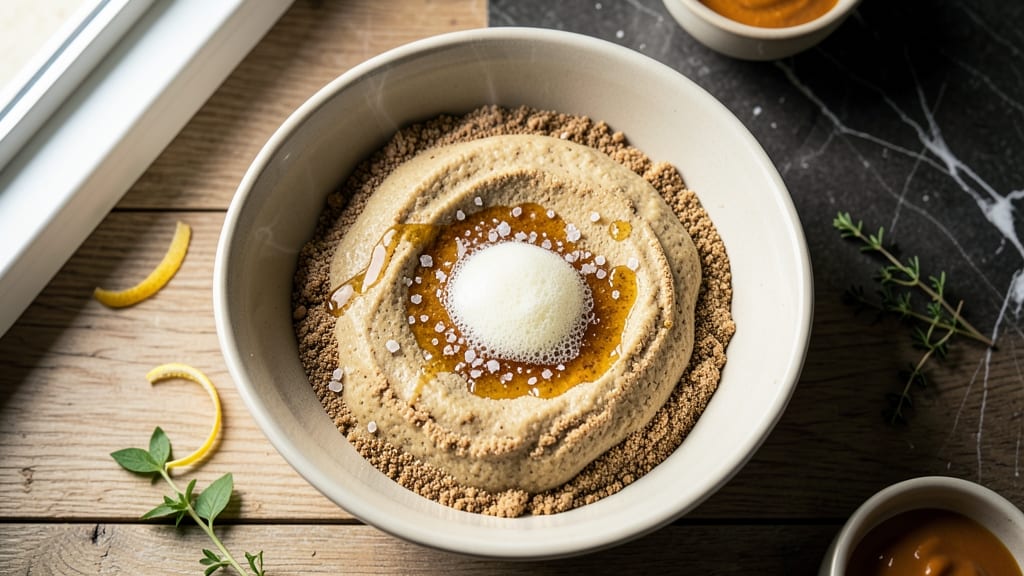
This all-wheat bread recipe transforms simple pantry staples into a loaf with a crusty exterior, nutty depth, and tender crumb—perfect for sandwiches or toast.
The secret lies in a precise mix of whole wheat flour, yeast, and a touch of honey that balances earthy flavors while creating a golden-brown crust. I’ve perfected this method over years of baking, ensuring it’s foolproof for beginners yet impressive enough for experienced bakers.
Unlike dense commercial loaves, this recipe delivers a light yet hearty texture by incorporating a small amount of bread flour for structure and a slow fermentation process that develops rich flavor.
The Dutch oven method locks in steam for the first critical minutes, guaranteeing that crispy crust you crave without a bread machine. Whether you’re making it for a family dinner or meal prep, the aroma alone will have everyone gathering around the kitchen.
What sets this apart is its adaptability—swap honey for maple syrup for vegan-friendly results, or add seeds for extra crunch. The dough requires just 15 minutes of prep and 2 hours of hands-off rising, making it ideal for busy schedules.
Once baked, it stays fresh for days, with a slight improvement in flavor as it sits. This isn’t just bread; it’s a versatile canvas for soups, charcuterie boards, or your favorite PB&J.
The key to success? Patience and precision—measuring ingredients by weight for consistency, proofing the dough until it’s puffy but not overproofed, and baking at the right temperature to avoid a heavy crumb.
Follow these steps, and you’ll end up with a loaf that rivals artisanal bakery bread. Ready to bake?
Ingredients for all wheat bread
Pantry staples meet artisanal technique for bread with golden crust and nutty crumb.
| Ingredient | Amount | Notes |
|---|---|---|
| Whole Wheat Flour 🌾 | 3 cups | King Arthur or Bob's Red Mill preferred |
| Bread Flour 🌾 | 1 cup | For lighter texture and structure |
| Active Dry Yeast 🍞 | ¼ tsp | Fresh yeast if available, not instant |
| Granulated Sugar 🍚 | 1 tbsp | Feeds yeast for fermentation |
| Honey 🍯 | 1 tbsp | Balances earthy whole wheat flavor |
| Salt 🧂 | 1 ½ tsp | Diamond Crystal preferred for accuracy |
| Warm Water 💧 | 1 ¼ cups | 105-110°F for optimal yeast activation |
| Olive Oil 🫒 | 1 tbsp | Extra-virgin for richness |
| Sunflower Seeds 🌻 | ¼ cup | Optional for added crunch |
| Sesame Seeds 🌿 | 1 tbsp | Optional for nutty flavor |
| Cornmeal 🌽 | ¼ cup | For dusting Dutch oven |
The flours are where magic happens—King Arthur whole wheat and bread flour blend for that perfect balance of heartiness and lightness. Bob's Red Mill works too, but avoid white whole wheat unless you want a denser loaf. Yeast is non-negotiable here: if your pantry yeast is past its prime (older than 3 months), pick up fresh at Trader Joe's—their bulk bins are reliable. For the honey, local raw honey adds subtle floral notes, but store-bought works fine. Measure your salt carefully: Diamond Crystal is lighter than table salt, so don't eyeball it. The warm water temp matters—too hot kills yeast, too cold makes it sluggish. Use an instant-read thermometer if you're unsure.
No honey? Maple syrup or agave works 1:1 for vegan versions—just reduce other liquids slightly since syrup adds moisture. Out of sunflower seeds? Pumpkin seeds or flaxseeds add similar texture. The sesame seeds can be swapped for poppy or sesame-free if needed. For the Dutch oven step, if you don't have one, a heavy oven-safe pot with a lid works in a pinch. The cornmeal isn't just for dusting—it adds a subtle sweetness to the crust. Pro tip: Toast your seeds lightly before mixing—they'll add even more flavor. And if your kitchen's humid, reduce water by 1 tbsp** to prevent a gummy dough.
This dough keeps for 2 days in the fridge wrapped tightly in plastic—pull it out 1 hour before shaping. For longer storage, freeze shaped (unbaked) dough for up to 3 months—thaw overnight in the fridge before baking. The bread itself stays fresh 4-5 days at room temp if wrapped in a clean kitchen towel. For extra crunch, reheat slices in a 350°F oven for 5 minutes with a sprinkle of water. And save those crust bits—they're perfect for breadcrumbs or croutons. Make a double batch if you can: this bread freezes beautifully for quick toast later.
Why You'll Love This Recipe
- No-Knead Magic: I swear by the mix of whole wheat and bread flour—it’s the secret to a loaf that’s actually soft, not dense. Just toss everything in a bowl, let the yeast do its thing, and wake up to bread that smells like a bakery.
- Honeyed Warmth: That little spoonful of honey isn’t just for sweetness—it keeps the bread moist for days and gives it a subtle caramel depth. I’ll be real: my kids ask for it with butter and jam, no questions asked.
- Weeknight Workhorse: This bread handles everything—sandwiches, toast, French toast, even croutons. I make a double batch on Sundays because it’s the only thing that survives my chaotic workweek lunches.
- Budget Bakery: Whole wheat flour is cheaper than buying pre-sliced, and this recipe stretches further than store-bought. Plus, the leftovers? They last longer than my willpower to resist them. (Yes, even on a Tuesday night.)
Step-by-step instructions for all-wheat bread with crusty crunch
Here's how to transform whole grains into a loaf with perfect texture and depth.
Activate the Yeast and Mix the Dough
In a large bowl, combine the 1.25 cups warm water (between 105-110°F—test by dropping a bit of dough in; it should bubble within 5-10 seconds), 1 tbsp granulated sugar, and 0.25 tsp active dry yeast. Let sit for 5-10 minutes until frothy. If it doesn't bubble, your yeast might be dead—start fresh.
In a separate bowl, whisk together 3 cups whole wheat flour, 1 cup bread flour, 1.5 tsp salt, 1 tbsp honey, and 1 tbsp olive oil. Pour the yeast mixture into the dry ingredients and stir with a wooden spoon until a shaggy dough forms. The whole wheat flour will make this dough stickier than white flour dough—don't fight it.
Knead Until Smooth and Elastic
Turn the dough onto a lightly floured surface and knead for 8-10 minutes by hand (or 5-6 minutes in a stand mixer with a dough hook). You're aiming for a smooth, slightly tacky dough that springs back when poked. The whole wheat flour won't develop gluten as easily as bread flour, so focus on stretching and folding rather than aggressive kneading.
If the dough feels too dry, add 1 tsp warm water at a time until it's just cohesive. Too wet? Sprinkle in 1 tbsp flour. The ideal dough should be soft but not sticky enough to leave residue on your fingers. Real talk: whole wheat dough is trickier—don't overcorrect with extra flour or it'll turn dense.
First Rise Until Doubled in Size
Lightly oil a large bowl, place the dough inside, and cover with a damp towel or plastic wrap. Let rise in a warm spot (75-80°F) for 1-1.5 hours, or until doubled in size. The dough should feel puffy and jiggly when gently pressed. If using fresh yeast, this rise might be faster—watch closely after 45 minutes.
Here's the thing—whole wheat dough rises slower than white flour dough. If it doesn't double in 1.5 hours, let it go another 30 minutes. Patience here prevents a dense loaf. Once doubled, punch down the dough to release air and shape it into a round ball.
Shape and Second Rise Before Baking
Transfer the dough to a floured surface and shape it into an oval or round loaf. For extra crustiness, dimple the top with your fingers or use a fork. Place the shaped dough on a parchment-lined baking sheet, cover loosely with plastic, and let rise again for 30-45 minutes until puffy. The second rise should be shorter than the first.
Preheat your oven to 375°F while the dough rises. Sprinkle 0.25 cup cornmeal evenly over the baking sheet—this creates a crispy bottom crust. Right before baking, sprinkle the top with 0.25 cup sunflower seeds and 1 tbsp sesame seeds for texture and flavor. The seeds will toast beautifully during baking.
Bake for Crusty Crunch and Nutty Depth
Bake for 35-40 minutes until the internal temperature reaches 190-200°F and the crust sounds hollow when tapped. The bread should be deep golden brown with a crisp exterior and a tender crumb. If the top browns too quickly, tent loosely with foil after 20 minutes to prevent over-browning.
Remove from the oven and let cool on a wire rack for at least 30 minutes before slicing. The bread will continue to firm up as it cools, and the crust will develop even more crunch. Slice with a serrated knife for clean cuts—this bread is dense enough that a regular knife will crush it.
Pro Tips For Making All Wheat Bread
- STIR THE DOUGH LONG: Whole wheat flour is stubborn—it wants to clump like a teenager avoiding chores. After mixing wet and dry ingredients, get in there with a wooden spoon and stir by hand for 3–4 minutes. No stand mixer? No problem. The extra elbow grease breaks down gluten better than you’d think, and the bread turns out lighter.
- WEIGH YOUR FLOUR: Scooping whole wheat flour from the bag is a one-way ticket to dense bread. Use a kitchen scale—this isn’t optional. The recipe’s 1:1 ratio of whole wheat to bread flour is precise, and volume measuring (especially with whole wheat’s variability) guarantees disappointment. Trust me, your bread’s crumb will thank you.
- DON’T SKIP THE HONEY: That honey isn’t just for sweetness—it’s the bread’s insurance policy. Whole wheat dough dries out fast, and honey softens the crumb while feeding the yeast. Swap it for maple syrup if you’re out, but never skip it. I learned this after a batch turned out like a brick—sadly, the only thing edible was the crust.
- LET THE DOUGH CHILL: Whole wheat dough rises faster and collapses easier. After shaping, pop it in the fridge for 20–30 minutes before baking. The cold slows fermentation, tightens the crumb, and gives you a head start on that stubborn oven preheat. (Yes, even if you’re impatient like me.)
Common mistakes when making your all wheat bread
Over-Kneading the Dough
Whole wheat dough is far more delicate than white flour dough, and over-kneading will develop too much gluten, resulting in a tough, chewy loaf. Stop kneading once the dough becomes smooth and slightly elastic—about 8-10 minutes by hand.
I’ve ruined many batches by kneading until my arms ached, only to end up with bread that felt like shoe leather. 💫
Skipping the Proofing Time
Rushing the proofing stage is a surefire way to end up with a dense loaf. Whole wheat dough needs extra time to develop flavor and rise properly. Don’t be tempted to speed this up—let it rise until it’s doubled in size (about 1-1.5 hours for the first rise).
If your kitchen is cold, place the bowl near a warm oven with the light on to create a cozy environment for the yeast.
Using Cold Water
Cold water will shock the yeast, preventing it from activating properly and leading to a flat, underproofed loaf. Always use water that’s between 105-110°F—test it by dropping a bit of dough in; it should bubble within 5-10 seconds.
If you’re unsure, use an instant-read thermometer. I’ve had to toss dough more times than I’d like because I grabbed water straight from the tap without checking the temperature.
Ignoring the Dutch Oven Method
If you’re aiming for that perfect crusty exterior, a Dutch oven is non-negotiable. Without it, the bread will spread too much and lack the crispy, crackly crust you’re after. If you don’t have a Dutch oven, use a heavy oven-safe pot with a lid.
Place the pot in the oven while it preheats, then carefully transfer the dough in—this mimics the steam retention of a Dutch oven.
Overloading with Add-Ins
While seeds and nuts add great texture, overdoing it can weigh down the dough and prevent proper rising. Stick to the 0.25 cup sunflower seeds and 1 tbsp sesame seeds called for in the recipe.
If you’re tempted to add more, reduce the total amount of flour slightly to keep the dough balanced. I’ve made this mistake and ended up with a loaf that was more like a brick.
Cutting Too Soon
Patience is key when it comes to slicing your bread. Cutting it too soon will result in a gummy, uneven crumb. Always let the bread cool on a wire rack for at least 30 minutes before slicing.
This allows the structure to set and the crust to fully crisp. Trust me, the wait is worth it for that perfect slice every time. ✨
Nutrition facts
Frequently asked questions
Why does my all-wheat bread turn out dense?
Whole wheat flour absorbs more water and lacks the gluten structure of white flour, making it prone to density. The key fixes: reduce kneading time to 8-10 minutes (over-kneading toughens it), ensure proper proofing (1-1.5 hours until doubled), and use the Dutch oven method for even baking. If your kitchen is cold, place the rising dough near a warm oven with the light on to speed fermentation.
Can I substitute whole wheat flour with white whole wheat?
Yes, but expect a slightly denser texture since white whole wheat has less bran. For a 1:1 swap, add 1-2 tbsp bread flour to improve rise and structure. The flavor will be milder, but it's a great option if you prefer a lighter crumb. Test the dough consistency—if it feels too dry, add 1 tsp warm water at a time.
How do I store all-wheat bread to keep it fresh?
Wrap the cooled loaf tightly in a clean kitchen towel or beeswax wrap, then place in a paper bag at room temperature for 2-3 days. For longer storage, freeze sliced bread in a sealed bag for up to 3 months—thaw at room temp. To revive stale slices, warm in a 350°F oven for 5 minutes with a splash of water for crispy toast.
Is this recipe vegan-friendly?
Almost! Replace the honey with 1 tbsp maple syrup or agave (reduce warm water by 1 tbsp to balance moisture). For extra richness, use 1 tbsp vegan butter or coconut oil instead of olive oil. The yeast and seeds remain plant-based, so the entire loaf becomes vegan with these swaps.
What if my yeast doesn't activate?
Check your yeast's freshness—it expires after 3-4 months. Test it by mixing 1 tsp yeast + 2 tbsp warm water + 1 tsp sugar in a small bowl. If it bubbles within 5-10 minutes**, it's active. If not, toss it and start fresh. Store-bought yeast often works better than pantry yeast—try Trader Joe's or bulk bins for reliable results.