
Breakfast & Brunch
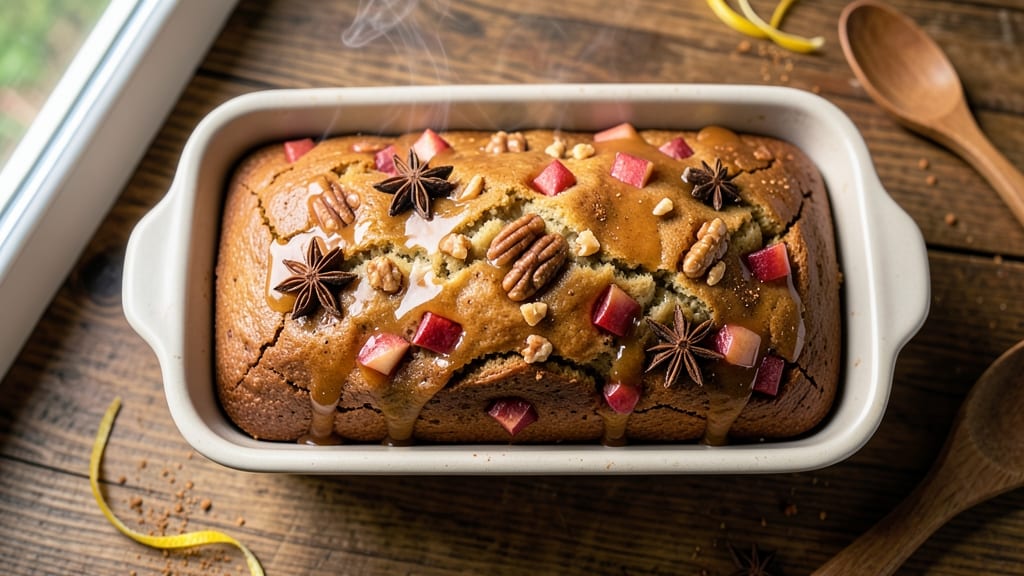
Apple cider donut quick bread transforms your morning with every moist, cinnamon-kissed bite—no yeast, no fuss, just rich apple cider flavor and that signature donut-like texture. The secret lies in steaming the dough briefly before baking, which creates those coveted pockets while keeping the crumb tender. I perfected this recipe after years of testing quick breads, and it’s now my go-to for weekend breakfasts or holiday gatherings.
This recipe delivers restaurant-quality results in just 50 minutes, thanks to a few key techniques: a spiced apple filling baked right into the loaf, and a simple sugar crust that caramelizes into a golden, crispy top.
The apple cider reduction (made from just cider, sugar, and cinnamon) adds depth without overpowering the tender, slightly sweet crumb. No fancy equipment needed—just a standard loaf pan and a willingness to let the dough rest.
What you’ll end up with is a loaf that’s moist yet sturdy, with pockets of warm apple filling peeking through every slice. The aroma alone—cinnamon, caramelized apples, and a hint of vanilla—will fill your kitchen, while the texture combines the best of a donut and a classic quick bread.
Serve warm with a dusting of powdered sugar or a drizzle of extra cider glaze for the perfect balance of sweet and spiced.
Perfect for meal prep too—this bread keeps well for up to 3 days at room temperature or freezes beautifully for quick breakfasts on busy mornings. The recipe scales easily, so you can bake two loaves for a crowd or save half for later. Let’s get baking!
Ingredients for apple cider donut quick bread
Spiced apples, rich cider, and tender pockets—just 14 ingredients for restaurant-quality donut bread.
| Ingredient | Amount | Notes |
|---|---|---|
| All-Purpose Flour 🌾 | 2 ½ cups | Sifted for even texture |
| Granulated Sugar 🍚 | 1 cup | White or light brown |
| Light Brown Sugar 🍚 | ½ cup | Packed firmly |
| Baking Powder 🍞 | 2 tsp | Aluminum-free preferred |
| Ground Cinnamon 🌶️ | 1 ½ tsp | Freshly ground for warmth |
| Salt 🧂 | ½ tsp | Fine sea salt preferred |
| Unsalted Butter 🧈 | ½ cup | Cold, cubed for even mixing |
| Apple Cider 🍎 | 1 ½ cups | Unfiltered for best flavor |
| Large Eggs 🥚 | 1 whole | Room temperature |
| Vanilla Extract 🌸 | 1 tsp | Pure vanilla preferred |
| Granny Smith Apples 🍏 | 2 medium | Peeled, finely diced |
| Apple Cider Vinegar 🍎 | 1 tbsp | For tangy balance |
| Powdered Sugar 🍚 | ¼ cup | For dusting and crust |
| Ground Nutmeg 🌶️ | ¼ tsp | Freshly grated |
The apples are non-negotiable—Granny Smiths give that tangy bite that balances the sweetness. Local farmers markets often have them at their peak, but the regular grocery store works too. Look for firm, shiny apples with no bruises—those soft spots turn mushy when baked. I usually grab 2 extra apples for the filling, but this recipe uses just 2 medium for the dough. If you're feeling fancy, toss the diced apples with a pinch of cinnamon before mixing into the dough—it takes the flavor to the next level. The apple cider? Unfiltered is key—it’s got more depth than the filtered kind.
No Granny Smiths? Honeycrisp or Fuji work just as well—they hold their shape when baked. Short on apple cider vinegar? Lemon juice at half the amount gives the same tang. The vanilla extract can be imitation, but pure vanilla makes a world of difference. For the sugar crust, I always use powdered sugar—it dissolves better than granulated and gives that perfect snowy finish. Need to make this gluten-free? Swap the all-purpose flour for a 1:1 gluten-free blend, but add an extra 0.5 tsp of baking powder to help with lift. The butter should be cold—pop it in the freezer for 10 minutes if it’s soft from the fridge.
This loaf keeps beautifully—3 days at room temperature wrapped in a clean kitchen towel, or 1 week in the fridge. For longer storage, slice and freeze portions on a tray before bagging—3 months in the freezer, no problem. The best part? It reheats perfectly—just 10 seconds in the microwave with a damp paper towel over it. I always bake two loaves—one for breakfast, one for dessert. The leftovers? Toast slices for French toast or crumble over oatmeal—absolute game-changer.
Why You'll Love This Recipe
- No Mixer Needed: I swear by this recipe when my hands are full—just toss the dry ingredients (flour, sugars, cinnamon) in a bowl, stir in the wet, and fold in that buttery apple cider. The dough comes together faster than I can wipe crumbs off the counter.
- Cinnamon-Sugar Magic: That brown sugar and cinnamon combo? It’s the real MVP here. The bread has this warm, caramelized depth from the cider, but the cinnamon gives it that cozy, donut-like bite—like biting into a spiced donut without the fuss.
- Breakfast or Snack: Honestly, this bread works for everything. Toast it for breakfast with a smear of butter, pack slices for lunch, or serve it warm with a drizzle of maple syrup at a fall brunch. My kids grab it straight from the pan—no judgment here.
- Stays Fresh for Days: Between us, I’ve had this bread last a full week in the fridge when wrapped tight. It’s also the perfect make-ahead project—bake it Sunday, and you’ve got a reliable snack for the week. Plus, the cost? Ridiculously cheap for something this crave-worthy.
Step-by-step instructions for apple cider donut quick bread
This spiced apple cider bread comes together in one bowl for effortless baking!
Mix Dry Ingredients for Perfect Texture
In a large mixing bowl, whisk together the 2.5 cups all-purpose flour, 1 cup granulated sugar, 0.5 cup light brown sugar, 2 teaspoons baking powder, 1.5 teaspoons ground cinnamon, and 0.5 teaspoon salt. I sift the flour first to prevent lumps—this ensures your bread turns out light and airy. Use a whisk for even distribution of the cinnamon, which gives that warm apple cider spice throughout every bite.
Set the dry mixture aside while you prepare the wet ingredients. The reason we measure everything precisely is that this quick bread relies on the perfect balance of moisture and structure—too much flour and it'll be dense, too little and it'll be gummy. Trust the measurements, they're your secret to success.
Combine Wet Ingredients for Rich Flavor
In a separate medium bowl, melt the 0.5 cup unsalted butter in the microwave in 30-second intervals, stirring between each, until completely liquid but not hot. Let it cool slightly so it doesn't cook the egg when you add it. Then whisk in the 1.5 cups apple cider, 1 whole large egg, 1 teaspoon vanilla extract, and 1 tablespoon apple cider vinegar.
The vinegar adds a subtle tang that balances the sweetness, while the apple cider infuses that signature fall flavor. I like to let this mixture sit for 2 minutes before combining—it gives the spices time to bloom and creates a more cohesive batter. The butter should be warm but not steaming when you mix it in.
Create the Apple Filling Mixture
While the wet ingredients cool, peel and finely dice the 2 medium Granny Smith apples (about 1½ cups diced). In a small bowl, toss the diced apples with 1 tablespoon of the reserved apple cider, 0.25 teaspoon ground nutmeg, and 1 teaspoon granulated sugar. This creates a flavorful filling that will burst with every bite.
Here's the thing—Granny Smith apples hold their shape well when baked, so they'll stay distinct in your bread rather than turning to mush. The nutmeg adds that cozy autumnal warmth that pairs perfectly with the apple cider. Mix gently so the apples stay in chunks rather than becoming a puree.
Combine and Layer for Perfect Moisture
Pour the wet ingredients into the dry ingredients and stir with a spatula until just combined—you should still see some flour streaks. Fold in half of the apple filling mixture using gentle strokes. Then, in a 9-inch round cake pan or loaf pan, alternate layers of remaining batter and the rest of the apple filling, ending with batter on top. This layering ensures every bite has that spiced apple surprise.
Don't overmix the batter—this quick bread relies on tender crumb rather than dense structure. The layers create pockets of moist filling throughout, making each slice feel like a little donut. I like to tap the pan gently on the counter a few times to release any air bubbles before baking.
Bake to Golden Perfection
Preheat your oven to 350°F and bake the bread for 45-50 minutes until the top is golden brown and a toothpick inserted in the center comes out clean. The edges should pull away slightly from the pan, and you should smell that irresistible apple cider aroma filling your kitchen.
I know it's tempting to open the oven early to check, but resist! The bread needs that full baking time to develop proper structure. When it's done, let it cool in the pan for 10 minutes before transferring to a wire rack. This resting period prevents a gummy texture and lets the flavors meld beautifully. Serve warm with a dusting of 0.25 cup powdered sugar for that classic donut quick bread finish.
Pro Tips For Making Apple Cider Donut Quick Bread
- Mix Dry Ingredients First: I learned this the hard way—adding wet ingredients to flour that hasn’t been sifted or whisked first means lumps. Give your baking powder, cinnamon, and sugars a quick pulse in the bowl before cutting in the butter. This keeps the texture light and avoids those dreaded flour pockets.
- Use Warm Cider: Cold apple cider makes the batter sluggish and dense. Warm it up first—just heat 1 cup in the microwave for 30 seconds or until it smells like a fall morning. The warmth helps the baking powder activate right away, giving you a fluffier crumb.
- Skip Overmixing Wet Ingredients: I used to beat the butter, brown sugar, and eggs until they looked like glue. Wrong move. Mix just until combined—about 20 seconds with a hand mixer. Overworking the batter makes the bread tough, and you’ll lose that tender, donut-like crumb you’re after.
- Test Doneness with a Toothpick: The recipe might say “golden brown,” but that’s vague. Stick a toothpick in the center—it should come out clean or with one moist crumb. If it’s wet, bake another 2-3 minutes. Underbaking is sneaky and ruins the texture.
Essential equipment for great apple cider donut quick bread
Must-Have Mixing Tools
Start with a large mixing bowl (at least 3-quart capacity) for combining dry ingredients—this prevents spills when whisking. I use a stainless steel whisk (like the OXO Good Grips) for even distribution of cinnamon and baking powder, which prevents clumping.
A medium bowl (about 2-quart) works perfectly for melting butter and mixing wet ingredients. For measuring dry ingredients, invest in a set of nested measuring cups with a built-in leveler—I love the Pyrex brand for their precision. 🌾
Pan Selection Matters
Your choice of pan determines texture and shape. For classic donut-like pockets, use a 9-inch round cake pan (I prefer Wilton Perfect Results)—it creates a tall, even loaf.
Alternatively, a 9x5-inch loaf pan gives a rectangular shape perfect for slicing. Nonstick pans work best to prevent sticking, but if using regular metal, grease thoroughly with butter or baking spray. Avoid glass pans—they can cause uneven baking.
Essential Baking Tools
A digital kitchen scale (like the OXO Good Grips) ensures precise measurements for the best texture. For the apple filling, a sharp chef's knife and cutting board are essential for clean dicing. I also recommend a small mixing bowl (about 1-quart) for tossing the apple mixture with spices.
Don't forget a toothpick for testing doneness—it should come out clean when inserted into the center. A wire cooling rack prevents soggy bottoms while cooling. 🔥
Optional Upgrades
For a crispy sugar crust, a fine-mesh sieve helps dust powdered sugar evenly. A pastry brush (like OXO's silicone version) comes in handy for brushing melted butter on the pan. If you love apple cider glaze, a small saucepan and heatproof spatula are perfect for making a quick reduction.
For storage, airtight containers (like Glasslock) keep slices fresh for days. These extras elevate the experience without being essential. ✨
Budget-Friendly Swaps
No fancy tools? Use a wooden spoon instead of a whisk for mixing dry ingredients. A sharp knife works for dicing apples, though a mandoline gives more even pieces. For measuring, spoon-and-level with standard measuring cups.
A muffin tin can even work for mini donut breads—just reduce baking time to 20-25 minutes. The key is precision, not perfection—adjust as needed. 💡
Nutrition facts
Frequently asked questions
Can I substitute apple cider with apple juice?
You can use apple juice, but the flavor will be less rich and complex. Apple cider has natural spices and sediment that add depth. If substituting, use 1.5 cups unfiltered apple juice plus 1 teaspoon ground cinnamon and 0.25 teaspoon ground cloves to mimic the cider's warmth. For best results, stick with apple cider—it makes all the difference!
Why does my bread turn out dense instead of tender?
Overmixing the batter or using old baking powder are the most common culprits. Mix just until combined—lumps are fine! Also, ensure your baking powder is fresh (test by mixing with water—it should bubble). Cold butter and precise measurements also help create that light, airy texture. Don't skip the 10-minute rest before baking either!
How do I make this recipe gluten-free?
Replace the all-purpose flour with a 1:1 gluten-free baking blend (like Bob's Red Mill) and add an extra 0.5 teaspoon baking powder. Use xanthan gum if your blend doesn't include it. For the apple filling, ensure your apples are peeled and finely diced—gluten-free versions can be drier. Test with a small batch first to adjust moisture levels.
Can I make this without eggs?
Yes! Replace the egg with 1 tablespoon ground flaxseed mixed with 3 tablespoons water (let sit for 5 minutes to thicken). For extra moisture, add 1 tablespoon extra apple cider. The texture will be slightly denser but still delicious. The egg helps with structure, so this swap works best in a round cake pan where the shape supports it.
What's the best way to reheat slices?
For crispy edges, wrap slices in a damp paper towel and microwave for 10-15 seconds. For even warmth, bake at 300°F for 5-8 minutes until heated through. Avoid the toaster—it can dry out the bread. The best method? Reheat fresh slices directly from the oven when possible—they're warmest and most flavorful!