
Side Dishes
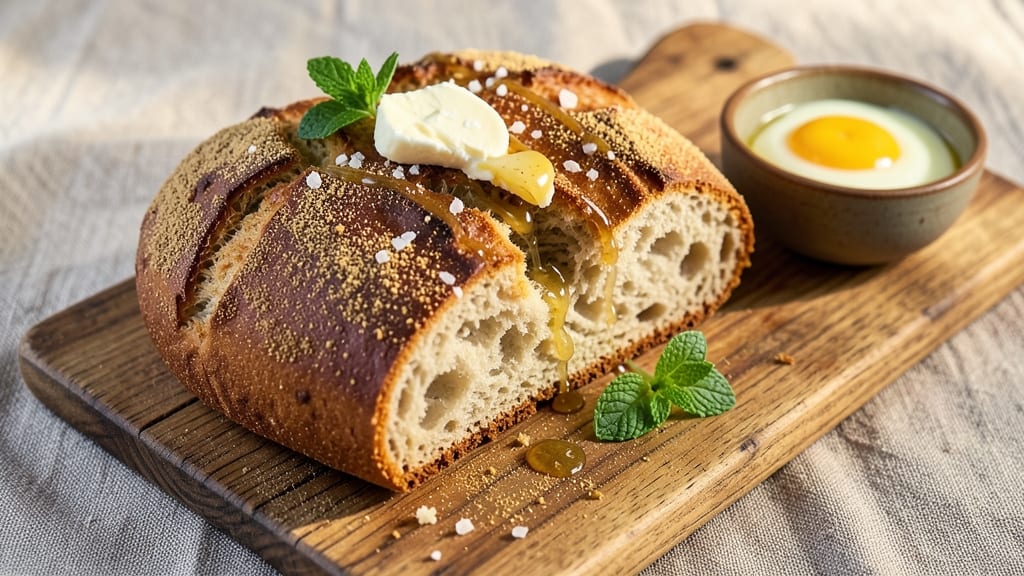
This atta flour bread recipe transforms whole wheat into golden, spiced loaves with a soft interior and crispy crust that smells like home. 🌟 The secret lies in a slow fermentation process that develops deep flavor while keeping the texture light—no heavy machinery required.
I’ve perfected this method over years of baking, balancing traditional techniques with modern convenience for foolproof results every time.
The dough comes together with simple ingredients—atta flour, warm water, yeast, and a touch of sugar—but the magic happens during kneading and proofing. Hand-kneading develops gluten for that signature chewy texture, while a long rise at room temperature (or overnight in the fridge) enhances flavor.
For those short on time, instant yeast speeds up the process without sacrificing quality.
What you’ll end up with is a fragrant, slightly sweet bread with a tender crumb and a crust that crackles just enough to hold onto every spiced aroma.
The aroma alone will have everyone gathering around the table, and the texture—soft yet sturdy—makes it perfect for sandwiches, toast, or serving alongside soups.
Optional variations let you customize: fold in honey for extra sweetness, sprinkle seeds for crunch, or add a pinch of cardamom for warmth. Whether you’re baking for a family meal or meal prepping for the week, this recipe delivers restaurant-quality bread with minimal effort. Let’s get started!
Ingredients for atta flour bread
Golden-brown crust and tender crumb await—just these 13 ingredients transform simple atta flour into restaurant-quality spiced bread.
| Ingredient | Amount | Notes |
|---|---|---|
| Atta Flour (Whole Wheat Flour) 🌾 | 4 cups | Freshly milled preferred for texture |
| Active Dry Yeast 🍞 | ¼ oz | Or 2.25 tsp instant yeast |
| Granulated Sugar 🍚 | 1 tbsp | For yeast activation |
| Warm Water 💧 | 1 ¼ cups | 110°F (43°C) ideal temperature |
| Unsalted Butter 🧈 | ¼ cup | Softened, full-fat preferred |
| Large Egg 🥚 | 1 whole | Room temperature for even mixing |
| Ground Cardamom 🌿 | ¼ tsp | Freshly ground for aromatic depth |
| Ground Cinnamon 🌶️ | ½ tsp | Warm, earthy flavor profile |
| Fine Sea Salt 🧂 | ¾ tsp | Diamond Crystal preferred |
| Sesame Seeds 🌰 | ¼ cup | Toasted for nutty crunch |
| Poppy Seeds 🌱 | 2 tbsp | Optional for decorative finish |
| Cornstarch 🌾 | 1 tbsp | For bread pan dusting |
| Honey 🍯 | 1 tbsp | Optional for sweetness variation |
The atta flour is the heart of this recipe—freshly milled atta yields the best texture, but store-bought whole wheat flour works in a pinch. For yeast, active dry yeast requires pre-dissolving in warm water with sugar, while instant yeast can go straight into the dry ingredients. Whole Foods or Indian specialty stores carry the best atta flour, but Bob's Red Mill whole wheat is a reliable substitute. The butter should be full-fat and softened—never melted, as this alters the dough's structure. Cardamom and cinnamon should be freshly ground for maximum aroma; pre-ground spices often lose potency. If you can't find ground cardamom, crush 4-5 pods yourself for authentic flavor.
No cardamom? Double the cinnamon for warmth, though the flavor will differ. Substituting whole wheat flour for atta? Use 1:1 ratio but add 1 extra tbsp water—atta absorbs moisture differently. For a sweeter loaf, replace 1 tbsp sugar with honey, though this slightly alters fermentation timing. The sesame seeds can be swapped for sunflower seeds or flaxseeds if unavailable. If your yeast is old (over 4 months), use 0.5 tsp extra to ensure proper rise. The egg adds structure—omit for vegan version, replacing with 1 tbsp ground flaxseed + 3 tbsp water as an egg substitute.
The dough ferments best at 75°F (24°C)—use an instant-read thermometer if your kitchen runs hot or cold. For best results, let it rise 1.5-2 hours at room temperature or overnight in the fridge for deeper flavor. Store baked loaves in a paper bag at room temperature for 2 days or freeze for 3 months. To reheat, wrap in foil and warm at 350°F (175°C) for 10 minutes. The crust stays crisp for 24 hours if kept in an airtight container, though the crumb softens slightly after 2 days.
Why You'll Love This Recipe
- No-Knead Magic: I swear by this dough—just mix the atta flour, yeast, and warm water, let it sit, and shape it. No standing at the counter, no overworking the gluten. The butter melts into the warm dough like butter on toast, and honestly? It’s the kind of hands-off recipe that makes me feel like a baking pro.
- Golden Crust Secret: That crispy, caramelized crust? It’s all in the sugar and butter. Brush the loaves with melted butter right before baking, and watch them turn into something straight out of a bakery window. Between us, it’s the kind of bread that disappears faster than my willpower on a lazy Sunday.
- Weeknight Workhorse: This bread is my go-to for breakfast wraps, sandwiches, or even toasted with jam. Freeze half the batch, and you’ve got fresh bread ready in minutes—no defrosting needed. I’ll be real: it’s saved my dinner plans more times than I can count.
- Pantry Staple Power: Atta flour, yeast, sugar—these are ingredients I already have. No fancy substitutions, no last-minute grocery runs. And because it keeps well, I bake two loaves on Sundays and call it a week. Budget-friendly? Absolutely. Reliable? Even more so.
Step-by-step instructions for atta flour bread
Here's the method for crafting a tender, aromatic atta flour bread with perfect swirls every time.
👨🍳 Step 1: Activate the Yeast and Mix the Dough
In a large mixing bowl, combine the 1.25 cups warm water (should feel like bathwater temperature) with the 1 tbsp granulated sugar and 0.25 oz active dry yeast. Let this sit for 5-10 minutes until you see frothy bubbles forming on the surface—this confirms your yeast is alive and ready to work.
While waiting, toast the 0.25 cup sesame seeds in a dry skillet over medium heat for 2-3 minutes until golden and fragrant. This enhances their nutty flavor. In a separate small bowl, whisk together the 1 whole large egg, 0.25 cup softened unsalted butter, 1 tbsp honey, 0.25 tsp ground cardamom, 0.5 tsp ground cinnamon, and 0.75 tsp fine sea salt until fully combined and smooth.
Once the yeast mixture is bubbly, gradually add the 4 cups atta flour to the wet ingredients while stirring with a wooden spoon. The dough will be shaggy at first—this is normal. After all the flour is incorporated, add the egg mixture and toasted sesame seeds. Mix until the dough comes together and begins to pull away from the sides of the bowl.
🥘 Step 2: Knead Until Elastic and Smooth
Transfer the dough to a lightly floured surface and knead for 8-10 minutes until it becomes smooth, elastic, and no longer sticky. You'll know it's ready when it springs back slowly when poked with your finger—a technique called the "windowpane test."
I like to use a dough scraper to help gather and fold the dough during kneading. This prevents overworking the gluten while ensuring even development. If the dough feels too dry, add 1 tsp warm water at a time; if too sticky, add 1 tbsp flour. The ideal dough should be soft but not tacky, and should hold its shape when pressed.
Once properly kneaded, shape the dough into a smooth ball. Place it in a lightly oiled bowl, cover with a damp kitchen towel, and let it rise in a warm place for 1-1.5 hours or until it has doubled in size. The dough should feel light and airy when pressed gently with your finger.
🔥 Step 3: Shape and Proof the Swirled Dough
Once the dough has risen, punch it down to release the air and divide it into 6 equal portions. Roll each portion into a 12-inch long rope, about 1 inch thick. Place all six ropes parallel to each other in a greased 9x5-inch loaf pan, then gently press down on them to create a flat surface.
Here's where the magic happens: using a sharp knife or bench scraper, make 4-5 diagonal cuts across the top of the dough at a 45-degree angle. Then, using your fingers, gently press down on the cuts to create swirls. This technique creates those beautiful decorative patterns while allowing the dough to rise beautifully. Sprinkle the 2 tbsp poppy seeds evenly over the top for added texture and visual appeal.
Cover the loaf pan with a damp towel and let the dough proof for another 30-45 minutes until it has risen about 1 inch above the pan and the swirls have become more pronounced. The dough should feel springy when pressed lightly.
🔥 Step 4: Bake Until Golden and Crisp
Preheat your oven to 375°F. While the oven heats, dust the inside of the loaf pan with 1 tbsp cornstarch to prevent sticking. This creates a crispy crust that's characteristic of traditional atta flour breads. You can also brush the top of the dough with a little water or milk for added browning.
Bake the bread for 35-40 minutes until it's golden brown on top and the internal temperature reaches 190-200°F when measured with an instant-read thermometer. You'll know it's done when it sounds hollow when tapped on the bottom and pulls away cleanly from the sides of the pan.
Remove the bread from the oven and let it cool in the pan for 5 minutes before transferring it to a wire rack. This resting period allows the bread to set properly and prevents it from becoming gummy. Serve warm for the best texture and flavor—each slice should have a soft, slightly chewy interior with a crispy crust and those beautiful swirled patterns.
Pro Tips For Making Atta Flour Bread
- Knead Like You Mean It: After burning three batches, I finally figured out that atta flour needs serious kneading—at least 10 minutes by hand or until the dough springs back when poked. Whole wheat fights you, so don’t rush it; the gluten development is what makes the bread tender, not dense.
- Use Room-Temp Butter: Cold butter pockets in atta bread turn into sad, greasy lumps. Take your unsalted butter out of the fridge 30 minutes before mixing—just until it’s soft enough to press into the dough without melting. Trust me, your bread’s layers will thank you.
- Skip the Overproofing: I learned this the hard way: atta dough rises fast when warm. Once the dough doubles in size, bake it within 30 minutes—no waiting for "perfect" volume. Overproofed atta bread collapses like a sad soufflé, and no one wants that.
- Toast the Flour First: My grandmother swore by this, and she was right: pulse 1 cup of atta flour in a dry pan for 2 minutes until fragrant. This removes raw flavors and adds depth. Mix it back with the rest of the flour before adding yeast—your bread will taste fresher, like it’s been baking for hours instead of minutes.
Troubleshooting this recipe
Dense Dough Issues
If your atta flour dough feels too dense or heavy after kneading, you’re likely dealing with overworked gluten or insufficient hydration.
I’ve found that atta flour absorbs moisture differently than all-purpose flour, so if the dough cracks when you press it, add 1 tsp warm water at a time until it becomes pliable. For extra insurance, let the dough rest for 15 minutes after mixing before kneading—this relaxes the gluten strands.
If the dough still resists, try replacing ½ cup atta flour with whole wheat flour for better elasticity. 🌾
Poor Rise or Flat Bread
A flat loaf usually means your yeast didn’t activate properly or the environment wasn’t warm enough. First, check your yeast: if it’s older than 4 months, use 0.5 tsp extra.
Place your dough bowl in a warm oven with the light on (about 75°F/24°C) or use a proofing box for consistent heat.
For overnight fermentation, cover the dough tightly with plastic wrap to trap moisture and place it in the fridge—this slow rise enhances flavor but requires 8-12 hours for full development. 🔥
Gummy or Underbaked Crust
An underbaked crust often happens when the oven isn’t hot enough or the bread is removed too soon. Always preheat your oven to 375°F for 20 minutes and use an instant-read thermometer to confirm the internal temp hits 190-200°F.
If the crust feels gummy, bake for an additional 5-10 minutes covered with foil. For extra crispiness, brush the top with milk or egg wash before baking—this creates a golden, crackly exterior. ⏰
Dough Sticking to Pan
Even with greased pans, atta flour dough can stick due to its density. Lightly dust the loaf pan with cornstarch (not flour) before shaping the dough—this creates a barrier that prevents sticking. For extra insurance, place a parchment paper liner in the pan and grease it lightly.
If the dough still clings, gently loosen the edges with a butter knife before baking. After baking, let the bread cool in the pan for 5 minutes before transferring to a rack. 🧂
Uneven Swirls or Cracks
If your swirls look uneven or the dough cracks excessively during proofing, the dough may have been over-proofed or the cuts were too deep. For perfect swirls, divide the dough into 6 equal portions and roll them into 12-inch ropes—uneven ropes create uneven swirls.
Make 45-degree angle cuts that are ¼-inch deep max, then gently press down with your fingers. If the dough cracks during proofing, it’s too dry—cover it with a damp towel to retain moisture. ✨
Nutrition facts
Frequently asked questions
Why does atta flour bread need such a long kneading time?
Atta flour contains more protein and fiber than all-purpose flour, which means the gluten needs extra time to develop properly. Kneading for 8-10 minutes by hand creates that signature chewy texture while keeping the crumb tender. For faster results, use a stand mixer with the dough hook attachment for 5-6 minutes on medium speed.
Can I make this bread without an egg?
Yes! For a vegan version, replace the egg with 1 tbsp ground flaxseed + 3 tbsp water—let it sit for 5 minutes to thicken first. The flax "egg" adds structure while keeping the bread moist. If you omit the egg entirely, reduce the water by 2 tbsp since eggs help bind the dough.
What's the best way to store leftover atta flour bread?
Wrap the cooled loaf in a paper bag at room temperature for up to 2 days to maintain crispiness. For longer storage, slice and freeze individual portions—reheat wrapped in foil at 350°F (175°C) for 5-7 minutes. The crust stays crisp for 24 hours if kept in an airtight container, though the crumb softens slightly after day 2.
How do I know when the dough is properly proofed?
Press your finger gently into the dough—if it springs back slowly (not immediately), it's ready. For the first rise, look for doubling in size (1-1.5 hours at room temp). After shaping, the dough should rise 1 inch above the pan in 30-45 minutes. A warm spot (like an oven with light on) speeds this up if your kitchen is cool.
Can I substitute whole wheat flour for atta flour?
Yes, but expect a slightly denser texture. Use 1:1 ratio but add 1 extra tbsp water—atta flour absorbs moisture differently. For best results, combine 3 cups whole wheat + 1 cup all-purpose flour to improve elasticity. The flavor will be similar, though freshly milled atta has more nuttiness.