
Desserts
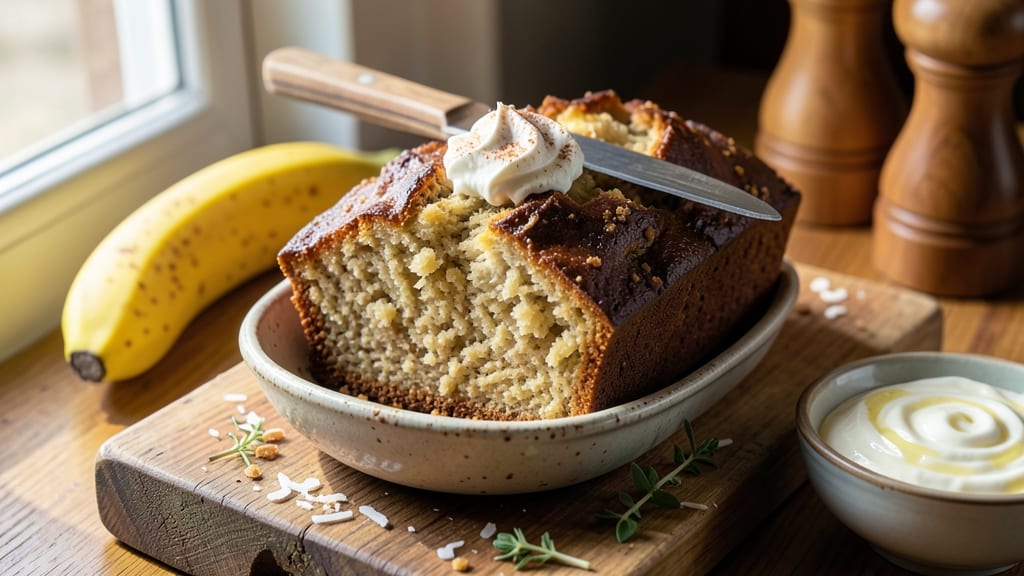
Australian café-style banana bread delivers the perfect balance of moist, spiced banana cake with a buttery crust and rich walnut swirls—just like the ones you'd find in Melbourne's best patisseries. ✨ The secret lies in using perfectly ripe bananas, a touch of cinnamon for warmth, and a streusel topping that adds texture and depth. This recipe transforms simple ingredients into a showstopping dessert that's ideal for brunch or a cozy afternoon treat.
What sets this apart from traditional banana bread is the café-inspired technique: a golden, crisp crust achieved through a buttery glaze, and pockets of toasted walnuts swirled through the batter for a nutty crunch in every bite.
The recipe is straightforward but yields professional results—no fancy equipment, just precise timing and attention to detail. The aroma alone will have everyone gathering in the kitchen while it bakes.
By the time it emerges from the oven, you'll have a loaf with a tender crumb, caramelized edges, and those signature walnut swirls that make it look as good as it tastes.
The buttery glaze adds a glossy finish that's irresistible, while the cinnamon-infused batter delivers a comforting warmth. This isn't just banana bread—it's a dessert that feels like a café experience at home.
Perfect for sharing with friends, gifting, or enjoying with a cup of tea. The recipe scales easily, so you can bake it for a crowd or save half for later—it keeps beautifully for days. Let's get started on this café-worthy masterpiece.
Ingredients for australian cafe style banana bread
Perfectly ripe bananas and toasted walnuts make this café-style bread irresistible with every slice.
| Ingredient | Amount | Notes |
|---|---|---|
| Ripe Bananas 🍌 | 3 medium | Slightly squishy when pressed |
| All-Purpose Flour 🌾 | 2 ½ cups | Sifted for fluffy texture |
| Granulated Sugar 🍚 | 1 cup | White or light brown |
| Light Brown Sugar 🍚 | ½ cup | Packed firmly |
| Unsalted Butter 🧈 | 1 cup | Room temperature, cubed |
| Large Eggs 🥚 | 2 whole | Room temperature |
| Pure Vanilla Extract 🌿 | 1 tbsp | High-quality preferred |
| Ground Cinnamon 🌶️ | 2 tsp | Freshly ground for warmth |
| Baking Soda 🧂 | 1 tsp | Pure, not baking powder |
| Salt 🧂 | ½ tsp | Fine sea salt |
| Walnuts 🥜 | 1 ½ cups | Chopped, toasted |
| Powdered Sugar 🍚 | ½ cup | For buttery glaze |
| Milk 🥛 | ½ cup | Any variety, room temp |
Those bananas are non-negotiable—look for ones with brown speckles that yield to gentle pressure. Woolworths or Coles usually have the ripest ones in their produce section. Toasting the walnuts (5 minutes in a dry pan) brings out their flavor—don't skip this step. For the butter, I always grab Plugrá from the dairy case—it melts beautifully. The cinnamon should smell vibrant, not dusty, so if your jar's been open for months, toast it in a dry pan for 30 seconds to wake up the flavor. And that vanilla? McCormick or Nielsen-Massey are my go-tos—nothing artificial about those bottles.
No walnuts? Pecans or macadamias work too, but walnuts give that signature café texture. Out of powdered sugar? Blend regular sugar in a food processor for 30 seconds—no one will know the difference. The milk can be any kind, but whole milk adds richness if you're splurging. For a dairy-free version, swap the milk for unsweetened almond milk. The baking soda and salt are simple but critical—measure carefully since this is a delicate balance. And if you're worried about overmixing, trust me, you can't mess up the batter—it's incredibly forgiving.
This loaf keeps beautifully—3 days at room temperature wrapped in foil, or up to 1 week in the fridge. For longer storage, slice and freeze—3 months is no problem. The glaze sets as it cools, so don't rush serving. I always bake two loaves at once—one for the family, one to gift. The aroma while baking? Absolute game-changer. That's when you know you've nailed it.
Why You'll Love This Recipe
- No Mash Required: I’ll admit, I was skeptical at first—no food processor or even a potato masher? But those ripe bananas blend right into the butter and sugars with a quick hand mixer. The dough stays thick and manageable, no sticky mess to fight.
- Caramel Crunch Core: That mix of light brown sugar and butter? It’s what makes this bread actually special. The edges get this buttery, crackly crust while the center stays moist—like a café version with none of the fuss. (Yes, even on a Tuesday night.)
- Breakfast or Snack Hero: I’ve served this warm with butter straight from the oven, sliced for school lunches, and even as dessert with ice cream. The balance of sweet and tender makes it work anywhere—no one ever questions why it’s on the table.
- Pantry Magic: Honestly, it’s my go-to when I’ve got overripe bananas and a handful of basics. The flour and sugars are cheap staples, and the butter adds richness without breaking the bank. Plus, it keeps for days—great for when you’re too tired to bake.
Step-by-step instructions for Australian café-style banana bread
Here's how to create that iconic Australian café texture—moist crumb, buttery crust, and walnut swirls in every slice.
👨🍳 Step 1: Prep the Bananas and Mix Wet Ingredients
Start by mashing the 3 medium ripe bananas with a fork in a large bowl until completely smooth. The bananas should be slightly squishy when pressed—this ensures perfect moisture. Add the 1 cup unsalted butter (room temperature) and mix until fully combined, creating a creamy base.
In a separate small bowl, whisk together the 2 whole large eggs, 0.5 cup milk, 1 tbsp pure vanilla extract, and 0.5 cup light brown sugar. This mixture should be smooth and pale yellow. Here's the thing—room temperature ingredients mix better and create a lighter texture. If your eggs are cold, let them sit in warm water for 5 minutes before using.
👨🍳 Step 2: Combine Dry Ingredients and Fold Gently
In a medium bowl, sift together the 2.5 cups all-purpose flour, 1 cup granulated sugar, 2 tsp ground cinnamon, 1 tsp baking soda, and 0.5 tsp salt. Sifting prevents lumps and ensures an even distribution of leavening agents. Make a well in the center of the dry ingredients and pour in the banana mixture.
Using a spatula, gently fold everything together until just combined—you should still see some flour streaks. Overmixing develops gluten and makes the bread dense. Real talk: don't use an electric mixer here. The goal is to maintain that tender, café-style crumb. Once combined, fold in 1 cup of the chopped walnuts, reserving the remaining 0.5 cup for the swirl.
🥘 Step 3: Prepare the Walnut Swirl and Assemble the Loaf
Lightly grease a 9x5-inch loaf pan and line the bottom with parchment paper. Pour half of the batter into the prepared pan. In a small bowl, mix the remaining 0.5 cup walnuts with 2 tablespoons of the reserved batter to create a thick paste. Spread this walnut mixture over the first layer of batter in a zigzag pattern.
Carefully pour the remaining batter over the walnut mixture. Here's where it gets fun—use a knife to swirl the walnuts through the batter, creating those beautiful café-style patterns. Don't worry if it's not perfect; the swirls will still be delicious. Tap the pan gently on the counter to release any air bubbles.
🔥 Step 4: Bake to Golden Perfection
Preheat your oven to 350°F. Bake the banana bread for 50-60 minutes, or until a toothpick inserted in the center comes out clean with just a few moist crumbs. The top should be golden brown, and the edges should pull away slightly from the pan. If the top browns too quickly, tent it loosely with foil after 30 minutes to prevent over-browning.
I like to check for doneness at the 50-minute mark—your oven might run hot, so start checking early. The internal temperature should reach 200°F at the center. Let the bread cool in the pan for 10 minutes before transferring to a wire rack to cool completely. This resting period prevents the bread from falling apart when you slice it.
🍽️ Step 5: Glaze and Serve
While the bread cools completely, make the glaze by whisking together the 0.5 cup powdered sugar and 2 tablespoons milk until smooth. You can adjust the consistency by adding more milk—it should be thick enough to coat the back of a spoon but still drizzle easily.
Once the banana bread is completely cool, drizzle the glaze evenly over the top. Use a fork to spread it slightly, creating that beautiful café-style finish. Let the glaze set for 10 minutes before slicing. Each slice should reveal those gorgeous walnut swirls throughout the moist crumb. Serve warm for the ultimate café experience!
Pro Tips For Making Australian Cafe Style Banana Bread
- Mash Bananas Properly: Use a fork—no blender—until the bananas look like wet oatmeal with no big lumps. I learned this the hard way when I over-blended and ended up with a dense, gummy loaf instead of that classic Australian café texture.
- Cream Butter and Sugars First: Whisk the softened butter with both sugars until it’s pale and fluffy—about 3-4 minutes. This isn’t just for fluff; it dissolves the brown sugar better, giving that rich, caramelised depth you’d expect from a café version.
- Don’t Overmix the Batter: Fold in the flour and mashed bananas just until combined—lumpy is fine. Overmixing develops the gluten, and that’s how you end up with a tough, dry loaf instead of the tender crumb you want.
- Test Doneness with a Skewer: Stick a thin skewer into the centre—it should come out with a few moist crumbs, not wet batter. If it’s sticky, bake another 5-10 minutes. Overbaking dries it out, and no one wants a sad, dense slice from a café-style loaf.
Pro cooking tips for australian cafe style banana bread
Banana Ripeness
This is the foundation of your café-style banana bread. Look for bananas with brown speckles and a slight give when pressed—these yield the sweetest, most flavorful mash. I always check the Woolworths or Coles produce section for the ripest ones.
Overripe bananas (blackened) work too, but the flavor becomes more intense. Freeze any extra ripe bananas for future batches—they’ll thaw perfectly when needed. 🍌
Butter Temperature
Room-temperature butter is non-negotiable for that light, fluffy crumb Australian cafés are known for. Take your butter out of the fridge 30 minutes before mixing—it should be soft but still hold its shape. I swear by Plugrá butter from the dairy aisle; it melts beautifully without separating.
If your kitchen is cold, microwave the butter in 10-second bursts until pliable. Cold butter creates dense bread, so don’t skip this step!
Swirl Technique
The walnut swirl is what makes this banana bread look café-worthy. After pouring half the batter into the pan, mix 2 tbsp of batter with the reserved 0.5 cup walnuts to create a thick paste. Spread this in a zigzag pattern, then pour the remaining batter over it.
Use a small offset spatula to gently swirl the walnuts into the batter—think marbling, not forcing. A few uneven swirls? No stress. The key is not overmixing once combined to keep that tender texture. ✨
Oven Prep
Preheat your oven to 350°F for at least 15 minutes before baking—this ensures even heat distribution. Place a tray of water on the lower rack to add moisture and prevent drying. If your oven runs hot (like mine does), tent the loaf with foil after 30 minutes to prevent over-browning.
I test doneness at 50 minutes with a toothpick—it should come out with moist crumbs, not wet batter. Patience here is key for that perfect café-style crumb.
Glaze Consistency
The glaze should be thick enough to coat the back of a spoon but still drizzle smoothly. Start with 0.5 cup powdered sugar + 2 tbsp milk, then adjust with 1 tsp more milk if needed.
Spread it evenly with a fork while the bread is still slightly warm—this helps it set faster. Let it rest for 10 minutes before slicing; rushing this step makes the glaze sticky and messy.
Pro tip: Dust with extra powdered sugar for a snowy finish straight out of a Melbourne bakery. 💫
Cooling Like a Pro
Never rush cooling! Let the bread sit in the pan for 10 minutes to set, then transfer to a wire rack. This prevents crumbling when slicing. For extra café appeal, brush the sides of the pan with melted butter before baking—it creates that golden, crisp crust.
If you’re short on time, slice the bread while still warm (it’ll be softer) and serve with a dollop of whipped cream or Greek yogurt for that authentic café touch.
Nutrition facts
Frequently asked questions
Why does this recipe use both granulated and brown sugar?
The combination creates the perfect texture and flavor balance. The granulated sugar dissolves quickly for even moisture, while the light brown sugar adds caramel notes and chewiness. Australian café-style banana bread needs that slight depth—brown sugar brings warmth and a subtle molasses flavor that pairs beautifully with cinnamon and walnuts.
Can I make this gluten-free or nut-free?
For gluten-free, swap the all-purpose flour for a 1:1 gluten-free baking blend (like Bob's Red Mill) and add 1 extra tbsp xanthan gum. For nut-free, omit the walnuts and replace with chopped dried cranberries or chocolate chips. The texture will be slightly different, but the moist crumb remains intact. Just reduce the milk by 2 tbsp if using chocolate chips to balance the batter.
How do I know when the banana bread is fully baked?
Use the toothpick test after 50 minutes. Insert it into the center—it should come out with moist crumbs (not wet batter) and no raw batter clinging. The internal temperature should reach 200°F. If the top browns too fast, tent with foil after 30 minutes. Overbaking dries out the crumb, so err on the side of slightly underdone if needed.
Can I bake this in a different-sized pan?
For a 9x5-inch pan, follow the recipe as written. For a 8x4-inch pan, reduce baking time by 10-15 minutes (check at 45 minutes). For a loaf tin, adjust quantities by 25%—this recipe scales well. Line all pans with parchment for easy removal. The walnut swirls may be closer together in smaller pans, but the flavor stays the same!
What’s the best way to store leftover slices?
Wrap individual slices in plastic wrap or store in an airtight container at room temperature for 3 days. For longer storage, freeze slices for up to 3 months. To reheat, warm in the microwave for 10-15 seconds or toast in a 350°F oven for 5 minutes** to restore freshness. The glaze may soften slightly when reheated—dust with extra powdered sugar if needed.