
Side Dishes
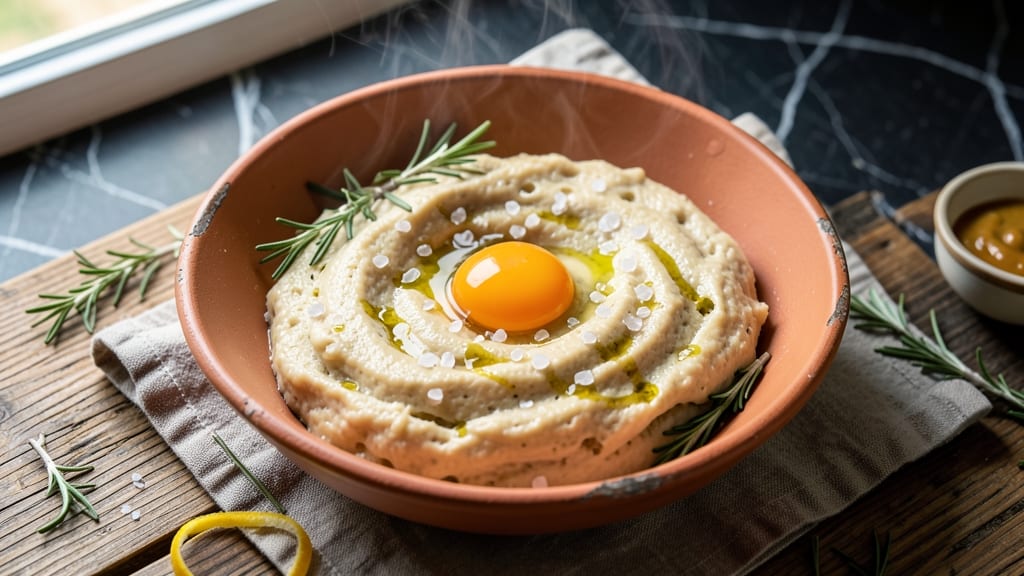
Authentic Tuscan bread delivers the rustic charm of Italy's countryside with its crispy crust and tender, olive oil-infused crumb. This recipe captures the essence of traditional Pane Toscano—simple yet profound, where quality ingredients and patience transform flour and water into something extraordinary. The key lies in the dough's gentle fermentation and the moment it emerges from a hot oven, golden and fragrant.
The process begins with a minimalist dough: just flour, water, yeast, olive oil, and salt—no shortcuts, no substitutions. Kneading by hand develops the gluten, while a slow fermentation at room temperature allows flavors to deepen naturally.
Shaping the dough into a round loaf and scoring it with a sharp blade isn't just decorative; it ensures even baking and that signature crackly crust.
Baking in a preheated Dutch oven or wood-fired oven mimics the traditional method, creating steam that builds the bread's signature structure. The result is a loaf with a crisp exterior and a soft, slightly chewy interior, where every bite carries the subtle richness of extra-virgin olive oil.
This bread pairs perfectly with soups, salads, or simply enjoyed on its own, still warm from the oven.
For those seeking authenticity, this recipe stays true to Tuscan tradition while adapting to home kitchens. The dough's simplicity belies its complexity—each step, from kneading to scoring, plays a role in crafting bread that tastes like a slice of Italy.
Ready to bake bread that transports you to the heart of Tuscany?
Ingredients for authentic tuscan bread
Four essential ingredients transform into Tuscan bread with golden crust and tender crumb.
| Ingredient | Amount | Notes |
|---|---|---|
| Bread Flour 🌾 | 3 ½ cups | High-protein for structure |
| Extra-Virgin Olive Oil 🫒 | ¼ cup | Italian, fruity variety |
| Active Dry Yeast 🍞 | ¼ tsp | Freshly opened for potency |
| Granulated Sugar 🍚 | ½ tsp | Enhances yeast activation |
| Diamond Crystal Kosher Salt 🧂 | 1 ½ tsp | Fine grain preferred |
| Warm Water 💧 | 1 ½ cups | 105-110°F for yeast |
| All-Purpose Flour 🌾 | ½ cup | For dusting work surface |
| Cornmeal 🌽 | 2 tbsp | For Dutch oven prep |
The bread flour is non-negotiable—its high protein content develops that signature chewy texture. King Arthur or Caputo brands deliver consistent results. For the olive oil, Italian extra-virgin with fruity notes is ideal; avoid the light, flavorless varieties. Yeast potency matters—always check the expiration date, and if using a jar, store it in the fridge. The warm water should be lukewarm to the touch (105-110°F)—too hot kills yeast, too cool slows activation. Salt quality affects flavor; Diamond Crystal dissolves evenly without graininess. Pre-measure everything for precision, especially the yeast and salt.
No bread flour? All-purpose plus 1 tbsp vital wheat gluten mimics the structure. Substituting olive oil? Avocado oil works neutrally, but loses that Tuscan character. Yeast too old? Fresh active dry yeast from a sealed package ensures reliable rising. The sugar can be swapped for honey or maple syrup (reduce to 0.25 tsp), though it may slightly darken the crust. For the Dutch oven, cornmeal creates a nonstick barrier—semolina works too. Shape the dough gently; over-handling develops gluten but risks a tough crumb. The scoring blade should be sharp—a razor or lame prevents tearing.
Freshly baked Tuscan bread reaches peak flavor within 24 hours as the crumb sets. Store wrapped in a clean kitchen towel at room temperature for 3 days, or freeze sliced portions for 3 months. Reheat slices in a dry skillet for 30 seconds per side to restore crust crispness. The olive oil-infused crumb softens over time, making it ideal for toasting or pairing with soups. For extra authenticity, brush the baked loaf with a thin layer of olive oil immediately after baking.
Why You'll Love This Recipe
- Five-Ingredient Magic: I swear by this—just flour, yeast, olive oil, sugar, and salt. No fancy add-ins, no stress. The yeast does the heavy lifting while I sip my coffee.
- Olive Oil Love: That rich, fruity EVOO isn’t just for drizzling—it’s baked right into every bite. The crust gets golden and crisp, while the inside stays soft and tender. (Yes, I eat it straight from the pan.)
- Every Meal Upgrade: Tear it for soup, toast it for breakfast, or serve it alongside pasta. It’s my go-to for lazy dinners, potlucks, or when I forget to buy bread. Honestly, it’s the unsung hero of my pantry.
- Budget Bread Wins: A loaf costs pennies to make, but it feels like a splurge. Freezes perfectly for weeks, so I bake one batch and never worry about running out. My wallet and taste buds both win.
Step-by-step instructions for authentic Tuscan bread
Master this traditional method for bread with a crisp, golden crust and tender olive oil-infused crumb.
Activate the Yeast for Maximum Rise
In a small bowl, combine the 1.5 cups warm water (between 105-110°F—too hot kills yeast), 0.5 tsp granulated sugar, and 0.25 tsp active dry yeast. Let it sit for 5-10 minutes until frothy. The yeast should create noticeable bubbles and a slightly effervescent surface—this confirms it's active and ready to work.
I always test the water temperature first with my finger—it should feel warm but not hot to the touch. If it doesn't bubble within 10 minutes, your yeast may be old or the water too hot. Discard and start fresh with fresh yeast and slightly cooler water.
Mix the Dough for Optimal Texture
In a large bowl, combine the 3.5 cups bread flour and 1.5 tsp Diamond Crystal kosher salt. Add the yeast mixture and 0.25 cup extra-virgin olive oil to the dry ingredients. Using a wooden spoon or dough whisk, mix until a shaggy dough forms, with flour still visible in patches.
This initial mix should feel slightly sticky but not wet. If it's too dry, add 1 tablespoon warm water at a time until just combined. The olive oil is crucial here—it creates the signature tender crumb of Tuscan bread while adding subtle fruity notes. Don't overmix yet; we'll develop the gluten in the next step.
Knead by Hand for Authentic Development
Transfer the dough to a lightly floured surface and knead for 8-10 minutes until smooth and elastic. I use the "windowpane test" to check readiness: stretch a small piece of dough thin enough to see light through it without tearing. The dough should feel slightly tacky but not sticky to the touch.
Traditional Tuscan bread often uses minimal kneading compared to French baguettes. The high-protein bread flour handles the structure while the olive oil prevents excessive gluten development. If the dough feels too sticky, add 1 tablespoon all-purpose flour at a time, but don't overdo it—this can make the bread dense.
First Rise for Proper Fermentation
Lightly oil a large bowl, place the dough inside, and cover with a damp kitchen towel. Let it rise in a warm place (around 75°F) for 1-1.5 hours, or until doubled in size. The dough should feel spongy and spring back slowly when poked gently with a finger.
This first rise is critical for flavor development. I place my dough near the oven with the light on for consistent warmth. If your kitchen is cold, extend the rising time by 30 minutes. Overproofing leads to dense bread, while underproofing results in poor oven spring—both ruin the authentic texture we're after.
Shape and Second Rise for Crisp Crust
Punch down the dough to release air, then shape it into a round loaf about 8 inches in diameter. Place it seam-side up on a parchment-lined baking sheet. Cover and let it rise for another 30-45 minutes until puffy and slightly domed.
The shaping creates surface tension that helps the bread expand in the oven. For extra authenticity, you can make a small cut in the top with a sharp knife before baking—this prevents excessive expansion and gives that classic Tuscan bread crown. The second rise should be gentler than the first, just enough to let the dough relax and develop flavor.
Bake in a Dutch Oven for Perfect Crust
Preheat your oven to 450°F with a Dutch oven inside for 30 minutes. Remove the Dutch oven and carefully transfer the shaped dough (still on parchment) into it. Sprinkle the 2 tbsp cornmeal evenly over the top—this creates that signature crisp crust while preventing sticking.
Bake covered for 25 minutes, then remove the lid and bake uncovered for another 10-15 minutes until the crust is deep golden brown and sounds hollow when tapped on the bottom. The internal temperature should reach 190-200°F.
Cool and Serve for Maximum Flavor
Remove the bread from the Dutch oven and transfer to a wire rack. Let it cool completely for at least 1 hour before slicing. The crust will crisp up as it cools, and the crumb will develop its characteristic tender yet slightly chewy texture.
Slice with a serrated knife for clean cuts that reveal the beautiful olive oil-infused crumb. Serve warm with olive oil for dipping or alongside your favorite Tuscan dishes. The bread will continue to improve for 24 hours as the starches retrograde, making it even more delicious the next day.
Pro Tips For Making Authentic Tuscan Bread
- Use Room-Temperature Olive Oil: The yeast in Tuscan bread needs to work, and cold oil slows it down. Let that extra-virgin olive oil sit out for 30 minutes before mixing—just enough to make it pourable but still rich. I used to skip this and wondered why my dough always took forever to rise properly.
- Salt the Water First: Tossing in kosher salt at the end means uneven distribution. Instead, dissolve the full 2% salt (by flour weight) in the water before mixing—this guarantees every bite has that subtle, balanced flavor. My grandmother swore by this, and she was right: the crust and crumb both benefit.
- Stretch, Don’t Punch: After the first rise, resist the urge to punch down the dough. Instead, gently stretch and fold the edges toward the center—this builds gluten without deflating the air bubbles. I learned this the hard way after collapsing three batches with aggressive punching.
- Steam the Oven: For that signature Tuscan crust, add a baking stone and a tray of boiling water to the oven 20 minutes before baking. The steam mimics a wood-fired oven, giving you a crisp exterior and airy interior. Sounds weird, but it works—your bread will thank you (yes, even if you’re impatient like me).
Serving suggestions for leftovers
Olive Oil Drizzle
Brush the warm bread with 1 tablespoon extra-virgin olive oil immediately after baking for that authentic Tuscan finish. The oil soaks into the crust, enhancing its crispness while adding a subtle fruity aroma.
I like to use a light hand—just enough to coat the surface without making it soggy. 🫒
Tuscan Pesto Pairing
Spread a thin layer of homemade basil pesto (made with pine nuts, garlic, Parmesan, and olive oil) on warm slices. The pesto's brightness contrasts beautifully with the bread's rustic texture. For extra flair, add a sprinkle of fresh basil leaves and a pinch of flaky sea salt.
Tomato & Basil Salad
Serve alongside a classic Caprese salad with heirloom tomatoes, fresh mozzarella, and basil. The bread's olive oil richness complements the salad's acidity, creating a perfect balance. I drizzle everything with balsamic glaze for an extra touch of sweetness.
Soup Companion
Pair with ribollita or minestrone soup for a traditional Tuscan meal. The bread's crusty exterior soaks up the broth beautifully, while its tender crumb holds up to hearty soups. For extra indulgence, tear warm bread into the soup at the table. 🍲
Simple Cheese Board
Create a rustic cheese board with Pecorino Toscano, aged Parmigiano-Reggiano, and fresh figs. The bread's olive oil notes harmonize with the cheeses, while the figs add natural sweetness. Add a few black olives and proscuitto slices for a complete Tuscan experience.
Breakfast Twist
Toast slices and top with ricotta cheese, honey, and chopped walnuts for a Tuscan-inspired breakfast. The bread's texture contrasts perfectly with the creamy ricotta, while the honey adds a touch of sweetness that balances the savory flavors.
Nutrition facts
Frequently asked questions
Why is olive oil essential in Tuscan bread?
The extra-virgin olive oil creates the bread's signature tender crumb while adding subtle fruity notes that define Tuscan flavor. Unlike other breads, it replaces some of the water in the dough, making the texture richer and more aromatic.
Can I make this bread without a Dutch oven?
Yes! Use a baking stone or steel preheated for 1 hour at 450°F. Place the dough directly on it and bake covered with foil for 25 minutes, then uncovered for 10-15 minutes to develop the crust. The steam trap is key for that authentic oven spring.
How do I know when the dough is properly kneaded?
Perform the "windowpane test": stretch a small piece of dough thin enough to see light through it without tearing. The dough should feel slightly tacky but not sticky, and spring back slowly when poked. Over-kneading makes the bread tough, while under-kneading results in poor structure.
What's the best way to store leftover Tuscan bread?
Wrap the cooled loaf in a clean kitchen towel and store at room temperature for 3 days to maintain freshness. For longer storage, slice and freeze portions for 3 months. Reheat slices in a dry skillet for 30 seconds per side to restore crust crispness.
Can I substitute bread flour with all-purpose flour?
For best results, use bread flour—its higher protein content develops the chewy texture. If you must substitute, mix 3 cups all-purpose flour + 1 tbsp vital wheat gluten per 3.5 cups called for. The gluten mimics bread flour's structure, though the flavor will be slightly less authentic.