
Side Dishes
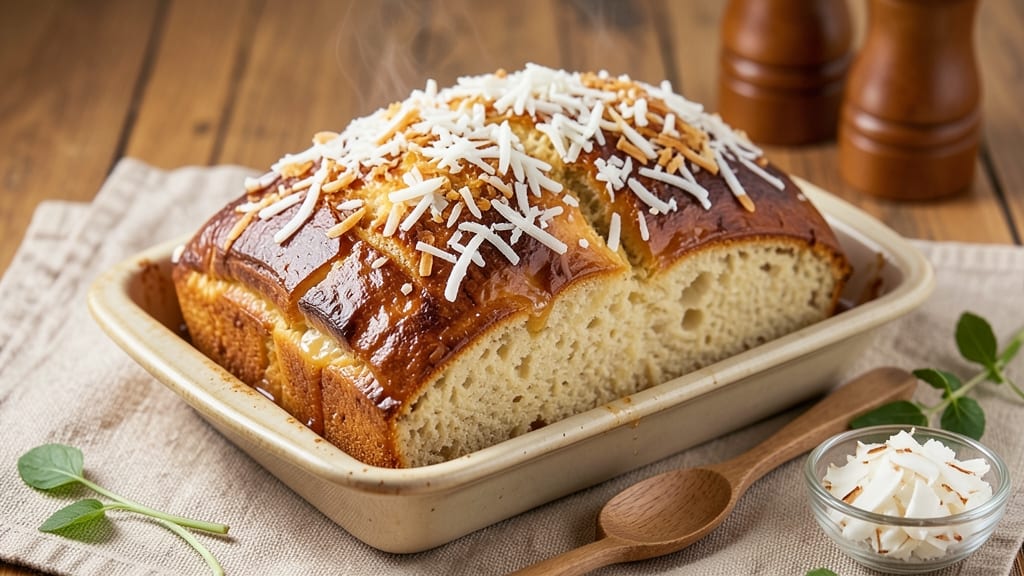
This Asian coconut bread recipe brings tropical flavors to your kitchen with its crispy crust and tender crumb—perfect for breakfast or as a sweet side dish. 🌴 The secret lies in blending toasted coconut with warm spices like cinnamon and cardamom, creating layers of aroma that transport you to a sunlit bakery.
I developed this version after years of experimenting with Asian-inspired breads, and it never fails to impress.
The dough combines all-purpose flour, yeast, and shredded coconut for that signature texture and flavor, while a touch of sugar feeds the yeast and enhances browning. Unlike traditional breads, this recipe incorporates coconut milk into the dough itself, ensuring every bite carries that rich, tropical essence.
The proofing process is key—letting the dough rise slowly develops depth of flavor and that signature soft crumb.
What you'll end up with is a loaf with a golden, crispy exterior that gives way to a moist, slightly dense interior studded with coconut flakes. The aroma alone will fill your home with warmth, while the taste balances sweetness with subtle spice.
This bread pairs beautifully with tea, coffee, or as a base for French toast—versatile enough for any occasion.
For an extra touch, brush the baked loaf with a simple honey glaze or sprinkle with toasted sesame seeds before serving. The recipe includes tips for adjusting sweetness or adding savory elements like miso paste, making it adaptable to your taste. Let's get baking!
Ingredients for asian coconut bread
Toasted coconut and warm spices make this bread smell like a tropical bakery.
| Ingredient | Amount | Notes |
|---|---|---|
| All-Purpose Flour 🌾 | 3 ½ cups | Sifted for light texture |
| Active Dry Yeast 🍞 | ¼ tsp | Or 1 packet (2.25 tsp) |
| Granulated Sugar 🍚 | ¼ cup | Feeds yeast and enhances browning |
| Unsalted Butter 🧈 | ½ cup | Softened to room temperature |
| Shredded Unsweetened Coconut 🥥 | 1 ½ cups | Toasted for enhanced flavor |
| Coconut Milk 🥛 | ½ cup | Full-fat for richness |
| Large Egg 🥚 | 1 whole | Room temperature preferred |
| Ground Cinnamon 🌿 | 1 tsp | Warm spice for depth |
| Ground Cardamom 🌿 | ½ tsp | Toasted for aroma |
| Fine Sea Salt 🧂 | ½ tsp | Adjust to taste |
| Honey 🍯 | 1 tbsp | For egg wash glaze |
| Toasted Sesame Seeds 🌰 | 1 tbsp | Optional garnish |
| Whole Milk 🥛 | ¼ cup | Warmed for dough activation |
The coconut is non-negotiable here—unsweetened, shredded is key. Toast it in a dry pan for 5 minutes until golden (watch closely, it burns fast). Trader Joe's has the best pre-toasted kind, but if you're toasting yourself, keep it moving. The coconut milk should be full-fat—canned is fine, but avoid the carton stuff. For the spices, Penzeys or bulk bins at natural grocery stores give you the freshest cardamom, which makes all the difference. I always double-check my yeast is active by plopping it in warm milk with a pinch of sugar—if it bubbles in 5 minutes, you're good to go.
No coconut milk? Substitute with extra coconut flakes plus a splash of warm water—it won't be identical, but it'll work. Running short on cardamom? Nutmeg at half the amount gives a similar warmth. The honey glaze can be swapped for maple syrup if you're avoiding honey. For a savory twist, add 1 tsp miso paste to the dough—trust me, it's amazing with tea. And if your coconut isn't toasted? Bake it in the oven at 350°F for 8-10 minutes with the dough to crisp it up during baking.
This dough is sticky—don't fight it. Use a stand mixer with a dough hook or go old-school with your hands. Let it rise in a bowl covered with a damp towel for 1-2 hours until doubled. The proofing is where the magic happens, so don't rush it. Once baked, the loaf keeps well for 3 days in an airtight container, but it reheats beautifully—just wrap in foil and warm in a 300°F oven for 10 minutes. Freeze slices for up to 3 months—perfect for quick breakfasts.
Why You'll Love This Recipe
- No-Fuss Dough: I swear, the yeast proofing takes less time than waiting for the oven to preheat. Just mix, let it rise once, and you’re done—no kneading, no fuss, no stress. That shredded coconut? Toss it in raw, no measuring cups needed.
- Tropical Twist: The butter and sugar give it that soft, buttery crumb, while the coconut adds this unexpected tropical crunch. Honestly, it’s like a cross between a brioche and a mochi—sweet, rich, and just a little bit indulgent without trying too hard.
- Breakfast or Snack: Slice it fresh for toast with jam, pack it for lunch with peanut butter, or serve it warm with tea. I’ve even used it to sop up curry—yes, really. It’s that kind of bread that works everywhere.
- Budget-Friendly Staple: Flour, yeast, butter, sugar—these are pantry basics. A single batch feeds my family for days, and the leftovers stay fresh for at least five days wrapped in a towel. Plus, the coconut adds that "special occasion" vibe without breaking the bank.
Step-by-step instructions for Asian coconut bread
Here's how to create that perfect balance of crispy crust and soft, coconut-kissed crumb.
👨🍳 Step 1: Activate the Yeast and Mix the Dough
In a small bowl, combine the 0.25 cup granulated sugar, 0.25 cup warm whole milk (about 110°F—test with your finger, it should feel warm but not hot), and the 0.25 tsp active dry yeast. Let this sit for 5-10 minutes until it becomes frothy and bubbly—this tells you the yeast is alive and ready to work.
In a large mixing bowl, whisk together the 3.5 cups all-purpose flour, 1 tsp ground cinnamon, 0.5 tsp ground cardamom, and 0.5 tsp fine sea salt. Make a well in the center and add the yeast mixture along with the 0.5 cup softened unsalted butter and 1 whole egg. Mix with a wooden spoon until a shaggy dough forms, then turn it out onto a lightly floured surface.
👨🍳 Step 2: Knead Until Silky Smooth
Knead the dough for 8-10 minutes by hand (or 5-7 minutes in a stand mixer with a dough hook) until it becomes smooth and elastic. You'll know it's ready when it springs back slowly when poked—this means the gluten has developed properly for that perfect soft crumb.
Here's a pro tip: If the dough feels too sticky, add just enough of the 3.5 cups all-purpose flour to make it manageable, but don't overdo it or you'll end up with a dense loaf. Once kneaded, place the dough in a lightly greased bowl, cover it with a damp towel, and let it rise in a warm place for 1-1.5 hours or until it doubles in size.
🥘 Step 3: Fold in Coconut and Shape the Loaf
Once the dough has risen, punch it down gently to release any air bubbles. On a lightly floured surface, fold in the 1.5 cups shredded unsweetened coconut and 0.5 cup coconut milk—this is where the tropical flavor really starts to develop. Gently press the coconut into the dough so it's evenly distributed throughout.
Shape the dough into a log and place it seam-side down in a greased 9x5-inch loaf pan. Cover it again with a damp towel and let it rise for another 45-60 minutes. The dough should rise just above the rim of the pan—this ensures that beautiful domed top and crispy crust.
🔥 Step 4: Bake for a Golden, Crispy Crust
Preheat your oven to 350°F while the dough rises. Once it's ready, whisk together the 1 whole egg and 1 tbsp honey in a small bowl for the egg wash. Brush this mixture generously over the top of the loaf, then sprinkle with the 1 tbsp toasted sesame seeds for that extra crunch and nutty flavor.
Bake for 45-50 minutes until the bread is deep golden brown and sounds hollow when tapped on the bottom. Here's the key: The internal temperature should reach 190-200°F—this ensures a perfectly baked crumb that's soft but not gummy. If the top browns too quickly, tent the loaf with aluminum foil to prevent over-browning while it finishes baking.
⏰ Step 5: Cool and Enjoy
Remove the bread from the oven and let it cool in the pan for 10 minutes before transferring it to a wire rack to cool completely. This cooling period is crucial—it allows the bread to set properly and prevents it from becoming soggy. The crust should be crispy enough to shatter slightly, while the inside remains soft and moist with coconut flavor in every bite.
Slice the bread into ½-inch thick pieces and serve warm. The contrast between the crispy crust and the soft, coconut-infused crumb is what makes this bread so special. Store any leftovers in an airtight container at room temperature for up to 2 days, or wrap them in plastic and freeze for up to 1 month for fresh-tasting bread whenever you want.
Pro Tips For Making Asian Coconut Bread
- Proof at Room Temp: Skip the fridge—let your yeast rise in a warm spot (like the top of your oven with the light on) for 45-60 minutes. I used to rush this, and my bread turned dense; now it’s light and airy every time.
- Toast the Coconut: Dry your shredded coconut in a 350°F oven for 5-7 minutes before mixing. This prevents soggy bread and adds a nutty depth—my grandmother swore by it, and she was right.
- Don’t Overmix the Dough: Stir just until the flour is incorporated; overworking it makes the bread tough. I learned this the hard way—now I mix until the dough clumps, then stop.
- Brush with Butter: After baking, let the bread cool 10 minutes, then brush the top with melted butter. It keeps the coconut crisp and adds a subtle richness—way better than skipping it.
Pro cooking tips for perfect results
Dough Temperature Control
Your dough's temperature makes all the difference in this recipe. The ideal dough temperature should be between 75-80°F—too warm and it rises too quickly, too cool and it won't develop properly. I always check by pressing my finger into the dough: if it springs back slowly, it's perfect.
If your kitchen is cold, let the dough rise near a warm oven with the light on for consistent results. 🌡️
Coconut Toasting Tricks
Never skip toasting your coconut—it's what gives the bread that nutty depth. Spread 1.5 cups shredded coconut on a baking sheet and toast at 350°F for 5-7 minutes, stirring every 2 minutes. Watch closely—it burns fast!
For extra flavor, add a pinch of cinnamon while toasting. I like to pulse the toasted coconut in a food processor for 2-3 seconds to break up any clumps before mixing into the dough.
Proofing Like a Pro
Proofing is where the magic happens, but timing varies with your environment. In humid weather, reduce proofing time by 15-20 minutes—the dough will rise faster. For best results, use a proofing basket or greased bowl with a damp towel.
Tap the dough gently: if it springs back slowly, it's ready. Overproofing leads to a dense loaf, so when in doubt, let it rise a little longer rather than too soon.
Pan Prep Secrets
Grease your 9x5-inch loaf pan thoroughly with butter or oil, then sprinkle with toasted sesame seeds for extra crunch. I also like to dust the pan with semolina flour instead of regular flour—it gives that beautiful golden crust.
For an extra touch, place a small bowl of water in the oven while baking to create steam, which helps develop that crispy crust. 🥖
Baking Time Adjustments
Oven temperature fluctuates, so always use an oven thermometer. If your bread browns too quickly, tent it with foil after 20 minutes. For a darker crust, increase oven temp to 375°F for the last 10 minutes.
The internal temperature should reach 190-200°F—this is more reliable than just looking at color. I've found that pulling the bread out when it's just slightly underdone ensures the perfect texture.
Cooling and Storing
Never skip the 10-minute rest in the pan—this prevents a gummy interior. For extra crispiness, transfer to a wire rack and cool completely before slicing. Store in an airtight container at room temperature for 2-3 days, or freeze slices for up to 1 month.
To revive stale bread, wrap in foil and warm at 300°F for 10 minutes—it'll taste fresh-baked again. ✨
Nutrition facts
Frequently asked questions
Can I make this bread without coconut milk?
Yes! Replace the 0.5 cup coconut milk with 0.5 cup warm water plus an extra 0.5 cup shredded coconut for texture. The flavor won't be identical, but it'll still taste delicious. For a richer alternative, use 0.5 cup full-fat Greek yogurt instead—it adds creaminess without coconut's dominant taste.
Why did my bread turn out dense instead of soft?
Dense bread usually means overproofing or under-kneading. Check your dough's rise time—it should double in 1-1.5 hours at room temperature. Also, knead for at least 8 minutes by hand to develop gluten properly. If your kitchen is cold, place the dough near a warm oven with the light on to help it rise evenly.
How can I make this bread gluten-free?
Swap the all-purpose flour for a 1:1 gluten-free baking flour blend (like Bob's Red Mill) plus 0.5 tsp xanthan gum. Reduce coconut milk to 0.3 cup and add 0.25 cup almond milk for better texture. Let the dough rise 30-50% longer since gluten-free dough rises slower. Expect a slightly denser but still delicious result!
Can I add chocolate chips or nuts to this recipe?
Fold in 0.5 cup chocolate chips or 0.5 cup chopped macadamia nuts when adding the coconut. For nuts, toast them first (like the coconut) to enhance flavor. Just reduce the coconut by 0.25 cup to keep the texture balanced. Pro tip: Use white chocolate for a tropical contrast!
How do I store leftovers to keep them fresh?
Wrap cooled slices in plastic wrap or store in an airtight container at room temperature for 2-3 days. For longer storage, freeze slices for up to 1 month. To revive, wrap frozen slices in foil and warm at 300°F for 5-7 minutes. The crust stays crispy while the inside remains soft—perfect for quick breakfasts!